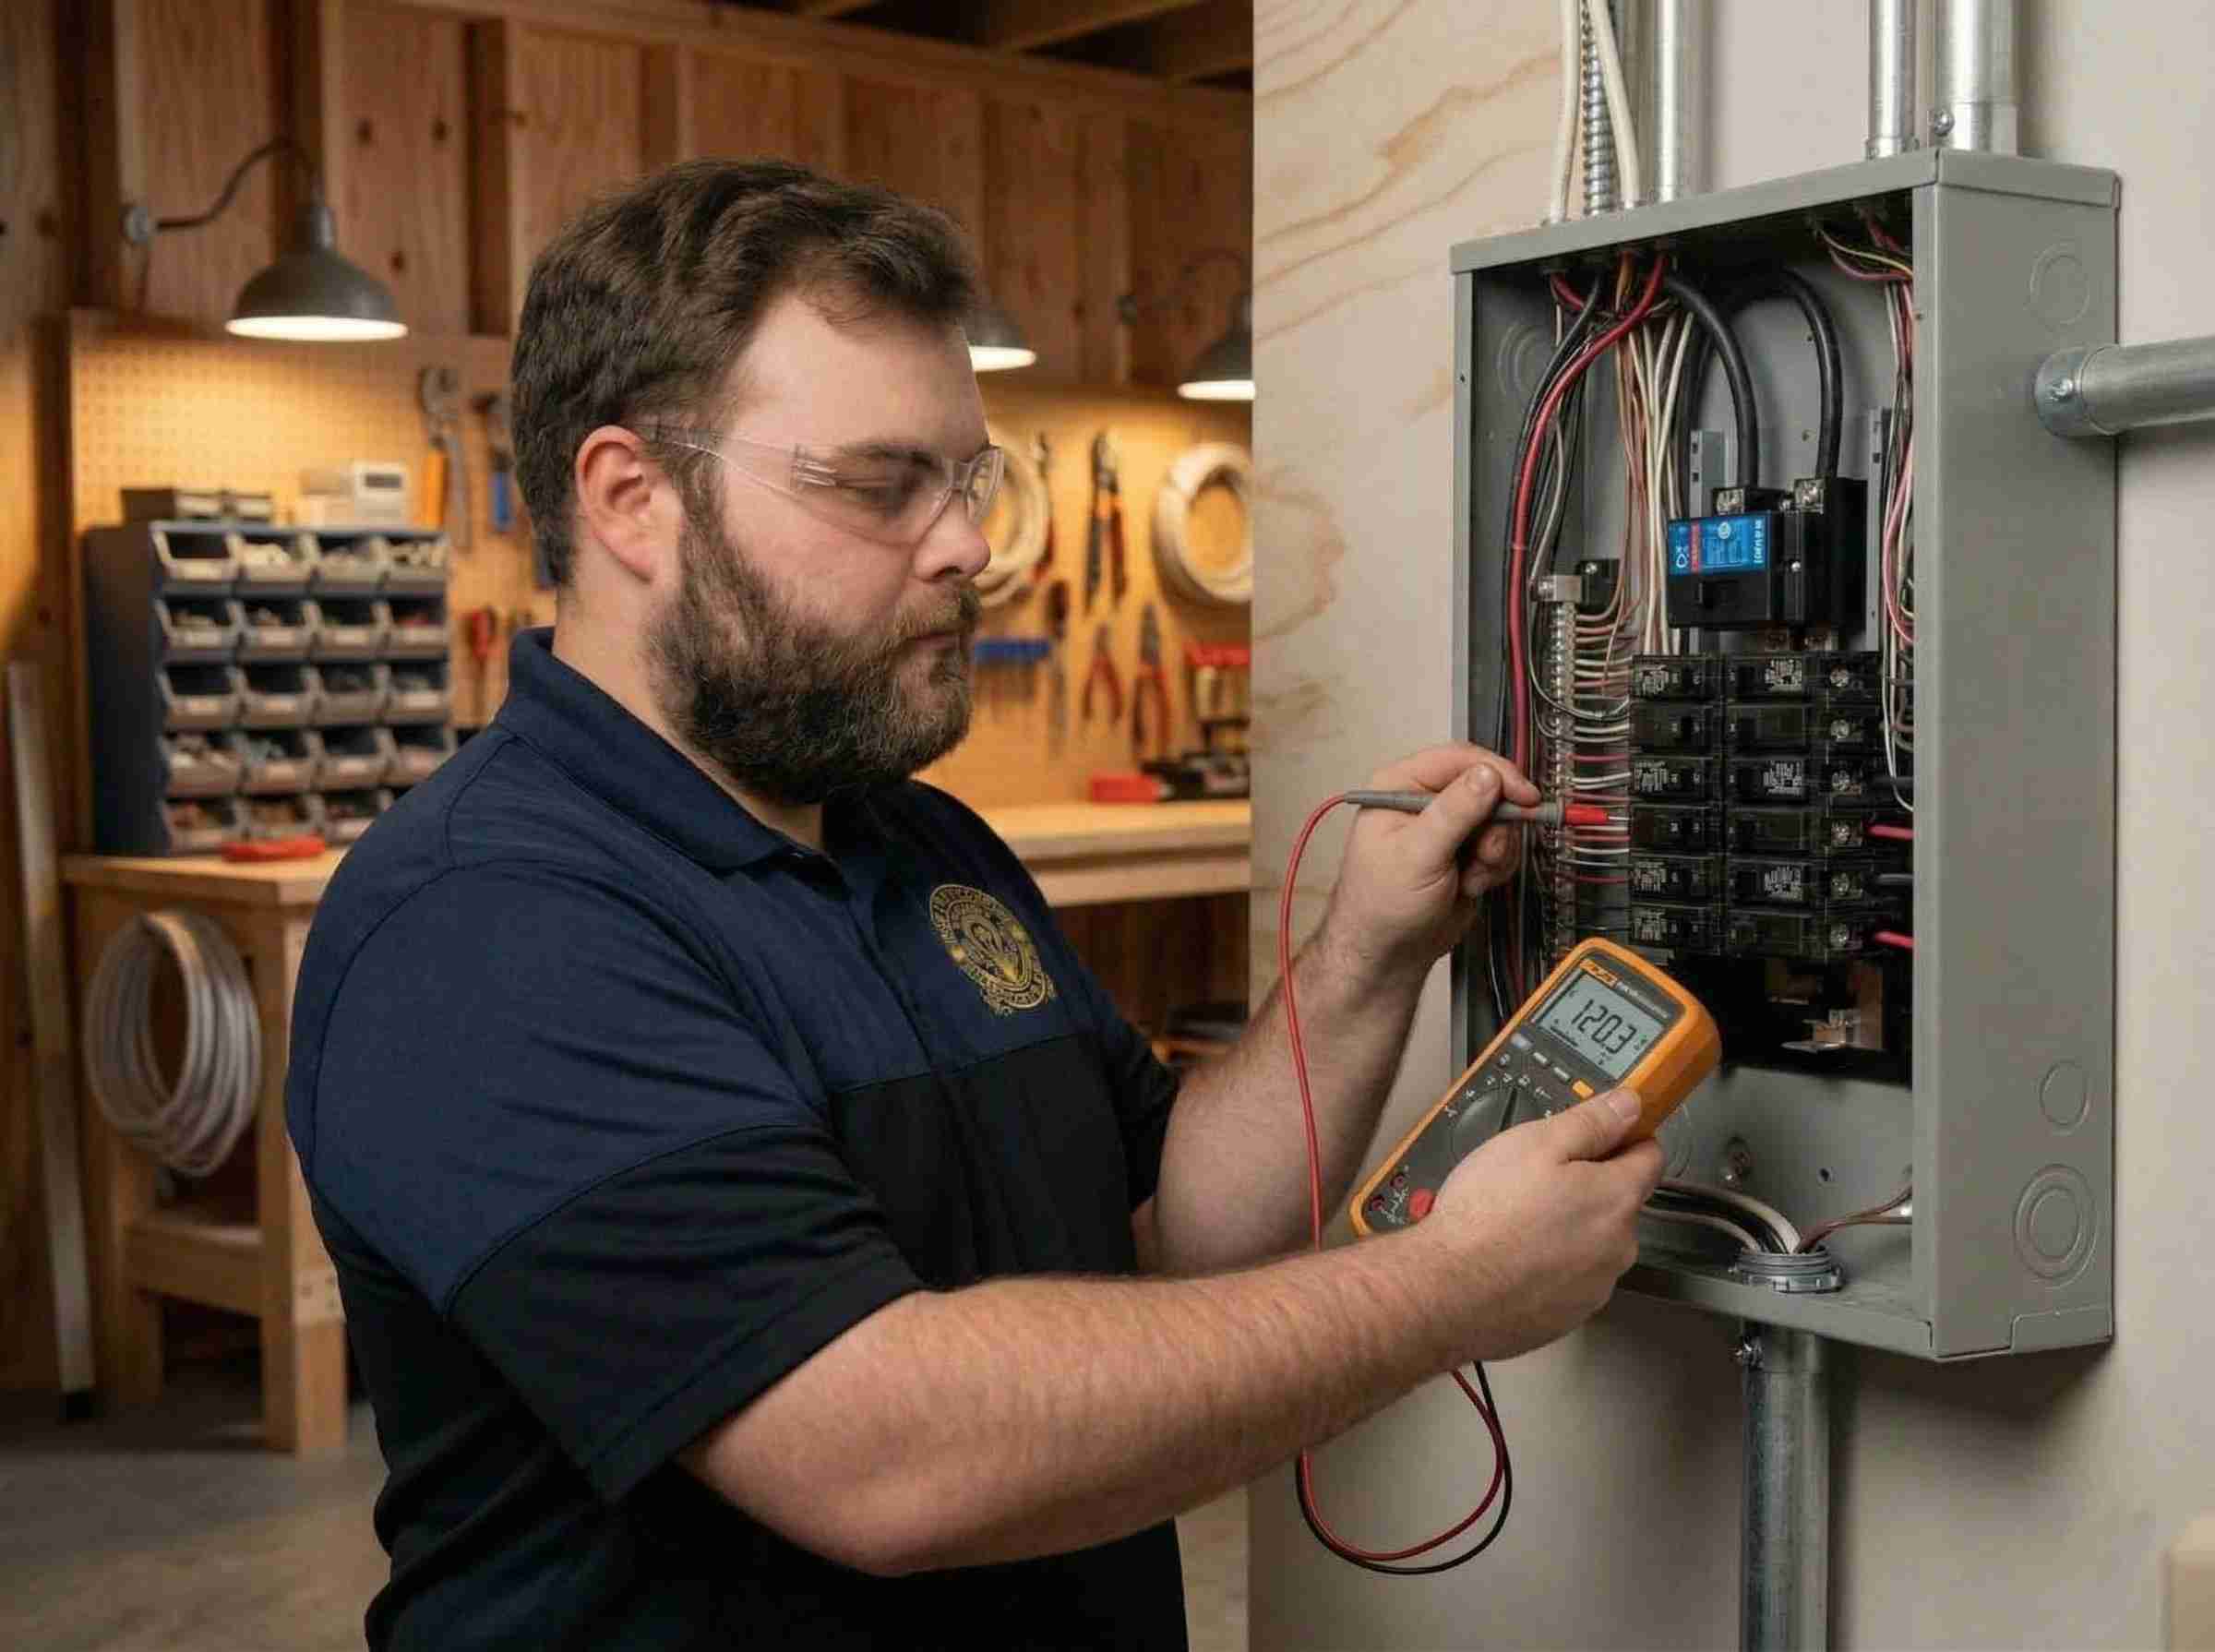
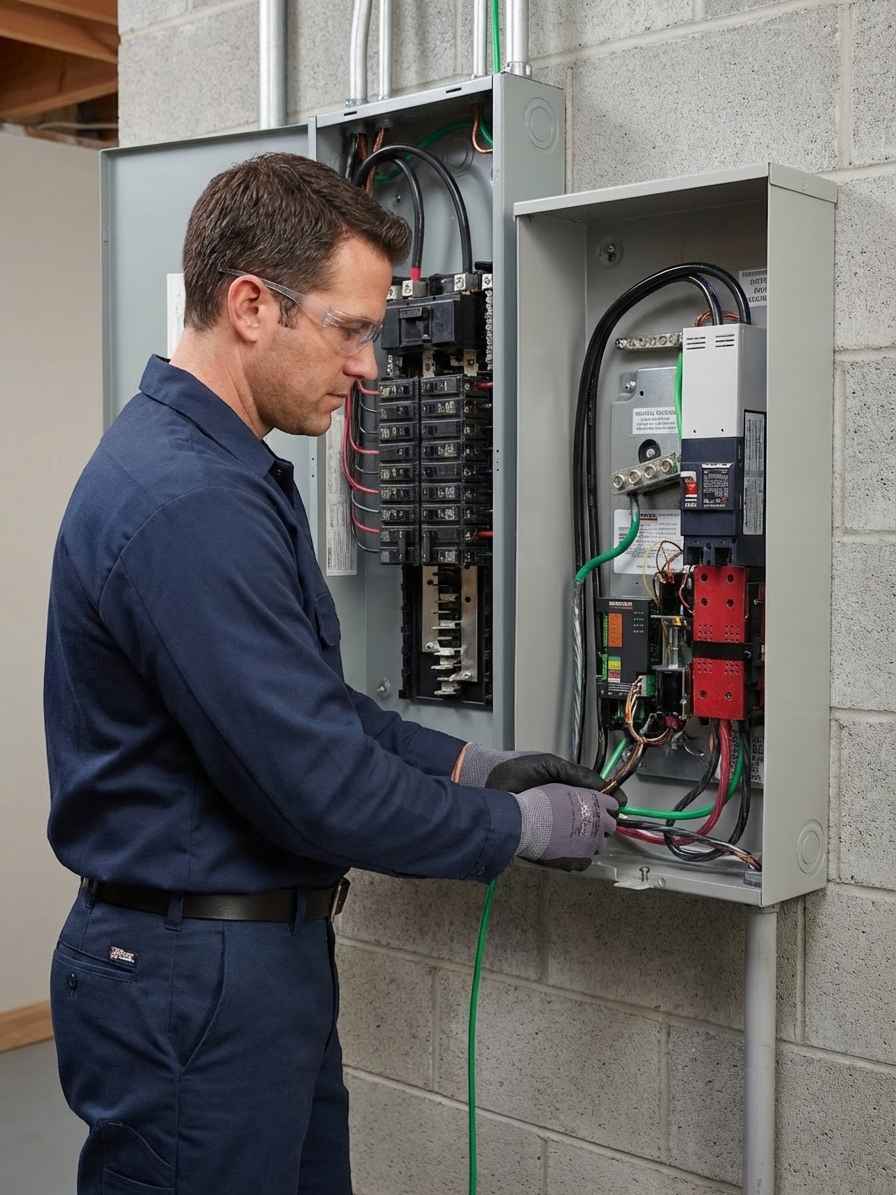
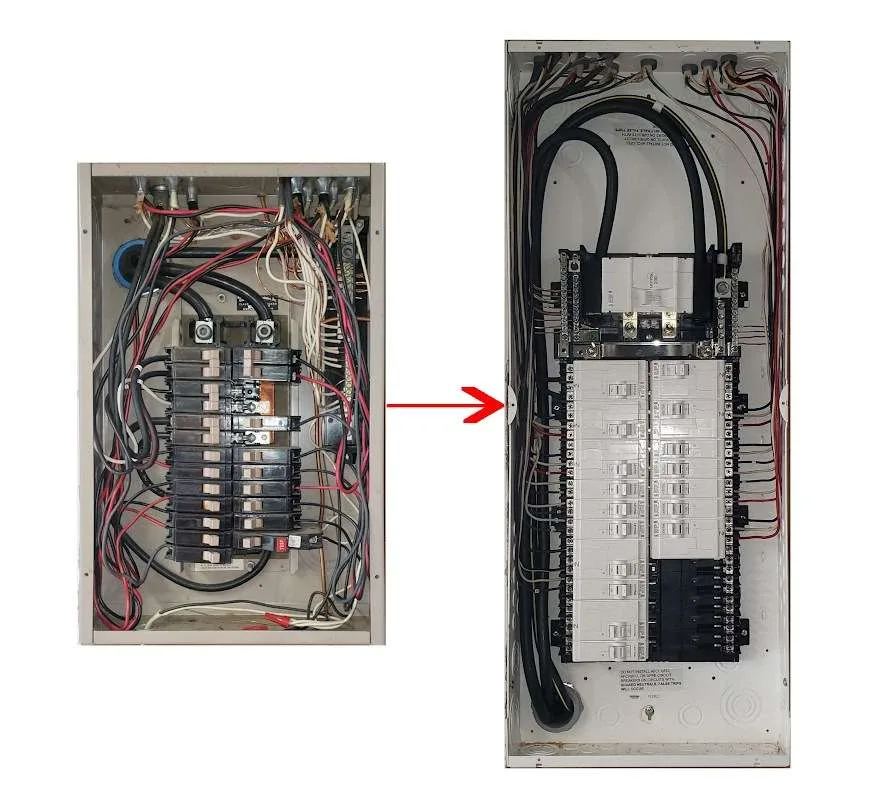
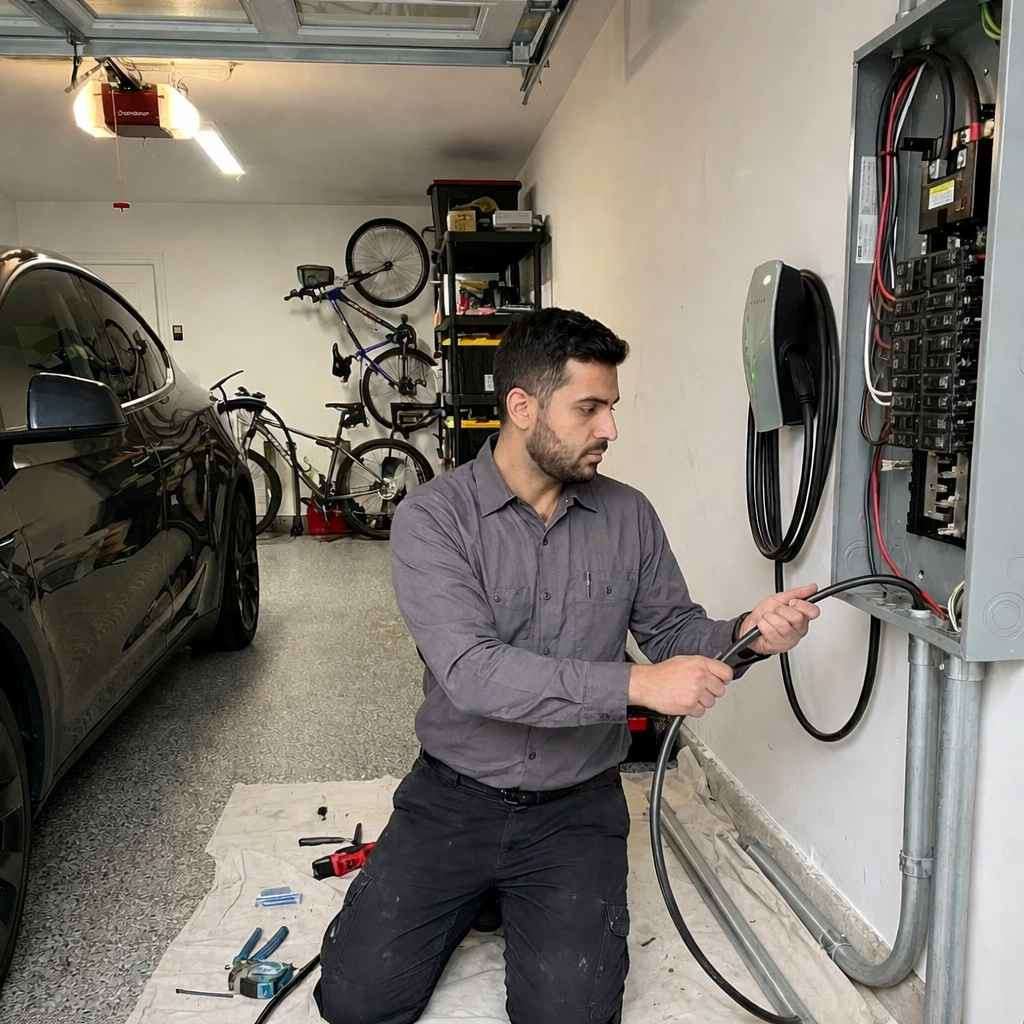
Whether you’re updating a single bathroom or gutting an entire kitchen, every remodel has an electrical side. From one outlet to a whole-home rewire – we handle it all, and permits are always included.
Electrical wiring for home remodels is one of the most common – and most misunderstood – parts of any renovation project. Whether you’re planning a full kitchen gut-job or simply adding an outlet behind a wall-mounted TV, there’s almost always an electrical component that needs a licensed professional. Most homeowners don’t realize how much has changed in the electrical code over the past decade. As a result, even a straightforward bathroom refresh can trigger new requirements for GFCI and AFCI protection, dedicated circuits, and tamper-resistant receptacles.
At Bright Haven Electric, we work on remodels of every size – as a subcontractor on your GC’s project or as the primary contractor when the scope is mostly electrical. Plus, we’re equally comfortable with a one-day finish window as we’re with a multi-visit rough-in, trim, and final schedule. Every project includes permits and no-stress state inspections at no extra cost.
Why Every Remodel Needs an Electrician
Many homeowners assume the electrical portion of a remodel is simple – just move a few outlets and call it done. However, modern code requirements have changed dramatically. The current NEC now requires arc-fault protection on nearly every living-space circuit, ground-fault protection in kitchens, bathrooms, laundry rooms, and garages, plus tamper-resistant receptacles everywhere. Consequently, even a “minor” remodel often involves panel work and new circuits. Working with existing wiring introduces its own challenges, too – especially in older homes with knob-and-tube wiring, aluminum branch circuits, or undersized panels.
What Triggers an Electrical Permit
In Minnesota, the following work always requires an electrical permit and a state inspection: adding or relocating any outlet, switch, or light fixture; installing or modifying a circuit; replacing a panel or adding a sub-panel; and wiring any new appliance. Therefore, if your remodel touches any wiring at all, you need a permit. At Bright Haven Electric, that permit is always included in the price – along with the inspection.
Common Remodel Scenarios We Handle
Our process is as flexible as your project demands. Below are the most common residential remodel scenarios we handle, from single-visit projects to multi-phase builds. We coordinate with your general contractor or work directly with you – whichever fits your project best.
Kitchen & Bathroom Remodels
Multi-Visit
Kitchen Remodel Wiring
Typical Scope: 6 – 10 new or modified circuits, GFCI countertop receptacles every 4 feet, dedicated 20A circuits for dishwasher, disposal, microwave, and refrigerator, under-cabinet LED lighting, and pendant or recessed ceiling fixtures.
NEC Requirements: Two dedicated 20A small-appliance branch circuits (NEC 210.52(B)), GFCI protection for all countertop receptacles within 6 feet of the sink (NEC 210.8(A)(6)), and AFCI protection on all 15A and 20A kitchen circuits (NEC 210.12(A)).
Our Process: We visit during the rough-in phase (walls open) to run all new wire, set boxes, and install any recessed lighting cans. After drywall and paint, we return for the trim visit – installing outlets, switches, fixtures, and covers. A final visit connects appliances and verifies every circuit. Throughout the process, we coordinate directly with your GC or handle scheduling ourselves.
⚡ Pro Tip: If your panel is full, a kitchen remodel is the ideal time to upgrade to a 200-amp service. We roll the panel upgrade into the same project and permit.
1 – 2 Visits
Bathroom Remodel Wiring
Typical Scope: Dedicated 20A bathroom circuit, GFCI-protected outlets, exhaust fan with humidity sensor or timer, vanity lighting, heated floor thermostat and circuit, and towel warmer outlet.
NEC Requirements: At least one dedicated 20A circuit for the bathroom receptacle(s) (NEC 210.11(C)(3)), GFCI protection for all bathroom outlets (NEC 210.8(A)(1)), and AFCI protection on the bathroom circuit (NEC 210.12(A)).
Our Process: Many bathroom projects are completed in one or two visits. If the walls are already open for tile work, we can rough-in and trim on the same visit. For larger bathrooms with heated floors or new ventilation, we coordinate a rough-in and trim schedule with your tile installer and plumber.
✅ Included: Electrical permit, state inspection, and removal of any outdated two-prong outlets or non-GFCI receptacles in the space.
Basements, Additions & Whole-Home Rewires
Multi-Visit
Basement Finish Wiring
Typical Scope: Multiple new circuits for bedrooms, living areas, home office, and home theater. Recessed lighting throughout, smoke and CO detectors, egress window outlets, and a dedicated home office circuit for computer equipment.
NEC Requirements: AFCI protection on all 15A and 20A bedroom and living-area circuits. Smoke alarms in every bedroom and outside each sleeping area, interconnected with a CO detector. Tamper-resistant receptacles on all outlets.
Our Process: Basement finishes follow the same rough-in and trim schedule as any new construction. We set all boxes, run wire, install recessed cans, and rough-in before insulation and drywall. After paint, we return for trim. Because basements often need 8 – 15 new circuits, we confirm panel capacity at the start and recommend a sub-panel if needed.
⚡ Pro Tip: If you plan to add a hot tub or sauna to your basement project later, tell us now. We can pre-run the wire and set the disconnect during the rough-in phase – saving you the cost of opening walls later.
Multi-Visit
Room Additions & ADUs
Typical Scope: Sub-panel fed from the main panel, full circuit layout for the new space, exterior outlets, porch lighting, smoke and CO detectors, dedicated HVAC circuit, and structured cabling for data and entertainment.
NEC Requirements: A load calculation (NEC Article 220) determines whether the existing service can handle the addition. If not, you need a 200A service upgrade before connecting the new space. Every room must meet all current code – including AFCI, GFCI, tamper-resistant receptacles, and interconnected smoke alarms.
Our Process: We typically start with a site survey and load calculation to determine whether a panel upgrade is needed. From there, we follow the standard rough-in, insulation, drywall, and trim sequence – coordinating with your builder on every phase. For ADUs and bunkhouses, we can also install a separate sub-panel and disconnect so the space has its own electrical identity.
Small Projects & Whole-Home Rewires
Same-Day
Small Projects & Single-Visit Work
Typical Scope: Adding an outlet behind a wall-mounted TV, installing a ceiling fan with a proper fan-rated box, swapping a light fixture, adding a dimmer switch, running a dedicated circuit for a window AC or space heater, or installing an outdoor outlet for landscape lighting and holiday lights.
Our Process: These projects are typically completed in a single visit – usually half a day or less. We show up, do the work, pull the permit, and schedule the inspection. No project is too small. Whether it’s one outlet or ten, the quality of workmanship and the permitting process are exactly the same.
✅ Same quality. Same permit. Same inspection. The size of the project never changes what’s included.
Multi-Day
Whole-Home Rewire
When It’s Needed: Homes with knob-and-tube wiring, aluminum branch wiring, fuse boxes, or panels that have been recalled or are at capacity. Insurance companies increasingly require remediation before they’ll renew a policy – and a full rewire is often the most cost-effective long-term solution.
Typical Scope: New 200-amp service, new main panel, all-new NM-B copper branch circuits, AFCI and GFCI protection on every required circuit, grounded three-prong outlets throughout, new smoke and CO detectors, and a clean, labeled panel schedule.
Our Process: A whole-home rewire is a multi-day project, but we plan it carefully to minimize disruption. We work room by room, maintaining power to the rest of the house. In most cases, you can stay in the home during the project. We coordinate all inspections, including the rough-in inspection before drywall patches and the final inspection after everything is trimmed out.
⚡ Pro Tip: If your home insurance company has flagged your wiring, contact us immediately. We’ve experience with insurance compliance letters and can provide the documentation your insurer requires.
How We Work: Subcontractor or Primary
One of the most common questions we get is: “Will you work with my general contractor, or do I hire you directly?” The answer is both – and we’ve a streamlined process for each.
Working as a Subcontractor
When we work as a sub on a GC-managed project, we coordinate directly with your builder on every phase. That means showing up at the times your GC schedules, following their punch list, and communicating through their project management process. However, we still pull our own electrical permit and manage the inspection directly – because that’s how Minnesota requires it. In other words, you get the convenience of a single point of contact through your GC while still receiving a fully permitted electrical installation.
Working as the Primary Contractor
When the scope is primarily electrical – a panel upgrade, a whole-home rewire, or adding circuits throughout the house – many homeowners hire us directly. We manage the project from start to finish: site survey, load calculation, material procurement, scheduling, permitting, and inspections. If you need patching or paint after we open walls, we coordinate that with our trusted partners or leave it for your handyman. Either way, the electrical scope stays under our control and our warranty.
Why Permits & Inspections Are Always Included
No-Stress Inspections – Every Time
Permits protect your resale value. Home inspectors flag unpermitted electrical work every time, and it can delay or kill a real estate transaction. Therefore, we pull a permit on every project – no exceptions.
Inspections verify safety. A state-licensed inspector reviews every installation to confirm it meets the current NEC and Minnesota amendments. You know the work is done right.
Insurance requires it. If unpermitted electrical work causes a fire, your homeowner’s insurance can deny the claim entirely. Consequently, a $50 permit is the cheapest insurance you can buy.
We handle everything. We pull the permit, schedule the inspection around your timeline, meet the inspector on site, and deliver the final approval documentation to you. In other words, you never have to think about it.
The cost is included in every quote. Permits and inspections are never a surprise line item. They’re always baked into the price from day one.
Understanding the Multi-Visit Process
For larger remodels, the electrical work typically happens in phases that align with the rest of the construction schedule. Understanding these phases helps you plan and prevents delays.
Rough-In Phase
When: After framing, before insulation and drywall.
What we do: Run all new wire (NM-B copper), set outlet and switch boxes, install recessed lighting cans, mount fan-rated boxes for ceiling fans, and pre-wire any smart home or structured cabling.
Inspection: A rough-in inspection happens at this stage so the inspector can see the wire runs before they’re covered. As a result, any corrections are made now – not after drywall.
Trim Phase
When: After drywall, texture, and paint.
What we do: Install all outlets, switches, dimmers, cover plates, light fixtures, ceiling fans, under-cabinet lighting, and any smart home devices. We also connect hardwired appliances such as dishwashers and disposals.
Why it matters: Everything you see and touch – every switch, every cover plate, every fixture – goes in during trim. This is the phase that determines the finished quality of your project. Consequently, we take our time to make sure everything is level, plumb, and clean.
Final Inspection & Closeout
When: After all electrical work is complete.
What happens: The state inspector returns to verify the finished installation. They test GFCI and AFCI devices, confirm proper grounding, check polarity on every outlet, and verify the panel schedule.
What you get: A final inspection sticker and documentation proving every circuit in your remodel is code-compliant. In addition, this documentation is your proof of quality work if you ever sell, refinance, or file a claim.
Typical Cost Ranges
Every remodel is different, so these ranges reflect typical project costs in the West Central Minnesota market. Your actual cost depends on the scope of work, the condition of your existing wiring, and whether a panel upgrade is needed. We provide a detailed, written quote before any work begins.
Single Outlet / Switch
$150 – $400
Same-day, single visit
Bathroom Remodel
$800 – $2,500
1 – 2 visits typical
Most Common
Kitchen Remodel
$2,500 – $6,000
2 – 3 visits, rough + trim + final
Basement Finish
$3,000 – $8,000
Multi-visit, scope-dependent
Addition / ADU
$4,000 – $12,000+
Includes sub-panel if needed
Whole-Home Rewire
$8,000 – $20,000+
Multi-day, includes 200A upgrade
What Drives the Cost Up
Panel upgrades: If your existing panel is full, undersized (100A), or contains recalled breakers, a panel upgrade adds $2,000-$4,000 to the project. However, this is often unavoidable and always worth doing.
Access difficulty: Finished ceilings, insulated walls, and slab-on-grade construction make wire runs harder and more time-consuming. Consequently, open walls during a remodel are the cheapest time to add circuits.
Code catch-up: Older homes often need additional work to bring existing circuits up to current code when new work is added in the same area. As a result, it’s better to address these issues during the remodel rather than defer them.
How to Plan the Electrical Side of Your Remodel
Time needed: 15 minutes
Before your contractor tears out the first cabinet, you should understand what the electrical side of a remodel involves. This walkthrough covers the key steps – from kitchen and bath wiring to panel capacity – so you can plan ahead and avoid costly surprises.
List every electrical change in the project
First, walk through the space and write down every outlet, switch, light fixture, and appliance that will move, change, or be added. A kitchen remodel, for example, typically adds dedicated 20A circuits for the dishwasher, disposal, microwave, and refrigerator – plus GFCI-protected countertop outlets every four feet along the backsplash.
Check your electrical panel for available space
Next, open your panel door and count the available breaker slots. A kitchen remodel alone can require four to eight new circuits. If your panel is full – or if you still have a 100A service – your electrician may recommend a panel upgrade or sub-panel as part of the project. This is also the time to identify any outdated or recalled breakers.
Decide on lighting and control preferences
Then, think about how you want the finished space to feel. Do you want recessed LED cans on a dimmer? Under-cabinet task lighting? A ceiling fan with a wall switch? Smart switches or three-way controls? These decisions affect how many switch legs and circuits your electrician runs during the rough-in phase – so it’s easier and cheaper to decide before the walls are open.
Confirm your project timeline with your electrician
Plus, coordinate your schedule with your electrician early. Electrical work on a remodel happens in phases: a rough-in visit before drywall, then a trim visit after paint. Some smaller projects – like a bathroom fan swap or an outlet addition – wrap up in a single visit.
Understand the permit and inspection process
Finally, know that in Minnesota, any new circuit, panel modification, or fixture relocation requires an electrical permit. Your electrician pulls the permit, schedules the state inspection, and handles the paperwork. At Bright Haven Electric, permits and inspections are always included in the quote – no hidden fees and no surprises.
Common Questions About Remodel Electrical Wiring
Do I need an electrician for a simple bathroom remodel?
In most cases, yes. If you’re adding or relocating any outlets, switches, lighting, or exhaust fans, that work requires an electrical permit in Minnesota. Even a straightforward bathroom refresh often involves upgrading to a GFCI-protected outlet, adding a dedicated 20-amp bathroom circuit (required by NEC 210.11(C)(3)), or wiring a new ventilation fan. We handle bathroom electrical work all the time – it’s one of the most common single-visit projects we do.
How many circuits does a kitchen remodel require?
The NEC requires a minimum of two dedicated 20-amp small appliance branch circuits for the countertop receptacles, plus individual dedicated circuits for the dishwasher, disposal, microwave, and refrigerator. If you’re adding an electric range or wall oven, that circuit is typically 40 to 50 amps. All told, a kitchen remodel can require six to ten new or modified circuits. I run a full load calculation for every kitchen project to make sure your panel can handle the new demand.
Can you work as a subcontractor on my general contractor’s project?
Absolutely. We work as a subcontractor on GC-led projects every day. Our team coordinates directly with your general contractor on scheduling, rough-in timing, and inspection windows so the project stays on track. We also take on projects as the primary contractor when the scope is primarily electrical – things like panel upgrades, whole-home rewires, or dedicated circuit additions. Either way, the quality of work and the permit process are exactly the same.
How long does the electrical portion of a remodel take?
It depends entirely on the scope. A single bathroom circuit or outlet addition is typically a one-visit, same-day project. A full kitchen remodel usually requires two to three visits: rough-in while the walls are open, trim after paint for outlets, switches, and fixtures, and sometimes a final visit for appliances. We coordinate all of this with your project schedule so there’s no downtime.
Do you pull permits and schedule inspections?
Always. Every electrical permit and state inspection is included in our quote at no additional cost. Inspections should never stress the homeowner, so we handle the entire process – pulling the permit, scheduling the inspection, meeting the inspector, and delivering approval to you. Skipping permits is never an option because unpermitted work creates problems when you sell, refinance, or file an insurance claim.
What if my panel is too small for the remodel?
If your existing panel doesn’t have enough space or capacity for the new circuits, we’ll recommend either a sub-panel (for additions, garages, or outbuildings) or a full 200-amp service upgrade. A panel upgrade is the single best investment you can make during a remodel because it future-proofs your home for EV chargers, heat pumps, hot tubs, and whatever comes next. We handle the upgrade, the utility coordination, and the inspection as a seamless part of the remodel project.
Do you handle small projects like adding a single outlet or switch?
Yes – and we do them all the time. Not every project is a full gut-job. We regularly add outlets behind wall-mounted TVs, install dimmer switches, run a dedicated circuit for a window AC unit, or add an exterior outlet for holiday lights. These are typically one-visit, same-day projects. No project is too small, and every project gets the same permit, inspection, and warranty.
Ready to Start Your Remodel?
From a single outlet to a whole-home rewire – permits and inspections are always included. Let’s talk about your project.
Power outages in West Central Minnesota aren’t a question of if – they’re a question of when. A backup generator installation gives your family the confidence and safety that comes from knowing the lights, heat, and well pump never stop.
A backup generator installation is the single most effective way to protect your home against the reality of extended power outages. In rural West Central Minnesota, ice storms, straight-line winds, and transformer failures can leave homes without power for hours – and sometimes days. Also, a standby generator detects the outage automatically and restores power to your home within seconds, without you lifting a finger. In contrast, a portable generator requires manual setup, extension cords, and carries serious carbon monoxide risks. As a result, more homeowners are choosing permanent standby generator installations to keep their families safe and comfortable year-round.
Why West Central Minnesota Needs Backup Generator Installation
Our service area stretches across some of the most storm-exposed terrain in the state. Specifically, long rural feeder lines, aging utility infrastructure, and severe seasonal weather create a perfect recipe for extended outages. Consequently, backup generator installation has become one of the most requested services at Bright Haven Electric. Here is why:
Risk Factor
Rural Power Grid Vulnerability
Long Feeder Lines:
Homes in Big Stone, Lac qui Parle, Swift, and Yellow Medicine counties often sit at the end of utility feeder lines that stretch 15 to 30 miles from the nearest substation. As a result, a single downed pole or failed transformer can cut power to dozens of homes for an extended period. Plus, repair crews in rural areas face longer response times than their metro counterparts.
Severe Weather Exposure:
West Central Minnesota experiences an average of 30 to 40 thunderstorm days per year, along with significant ice storm and blizzard events each winter. In particular, ice loading on overhead lines causes some of the longest outage events in the region. A backup generator installation ensures your home stays powered through all of it.
Key Point: According to the U.S. Energy Information Administration, the average American home experiences over 5 hours of power interruptions per year. In rural areas with long distribution lines, that number is significantly higher. A standby generator eliminates the impact entirely.
Who Depends on Backup Power the Most?
For homeowners who rely on well pumps for water, sump pumps for flood prevention, or medical equipment that must stay energized, a backup generator installation isn’t a luxury – it’s essential infrastructure. In addition, homes with livestock, walk-in freezers, or home-based businesses face significant financial losses during extended outages. Therefore, investing in reliable backup power protects both your family and your livelihood. For a deeper look at what severe weather means for your electrical system, see our complete guide to backup generators in West Central MN.
Standby vs. Portable Backup Generator Installation
Every backup generator falls into one of two categories: standby or portable. As a result, understanding the difference is the first step to choosing the right backup generator installation for your home and budget.
Comparison
Generator Type Breakdown
Standby Generator (Permanent Installation):
A standby generator is a permanently installed, weatherproof unit that sits on a concrete pad outside your home. It connects directly to your electrical panel through an automatic transfer switch and runs on propane or natural gas. When the power goes out, the automatic transfer switch detects the outage and consequently starts the generator within 10 to 30 seconds – without any action from you. As a result, your home power is restored automatically, even if you’re away. Standby units typically range from 10 kW to 24 kW+ for residential applications.
Portable Generator (Manual Operation):
In contrast, a portable generator runs on gasoline, sits in your garage or driveway, and requires manual setup. You must therefore start it by hand, run extension cords to individual appliances, and refuel it periodically. Portable generators typically produce 3,000 to 10,000 watts and can’t safely power an entire home. Plus, they pose a serious carbon monoxide risk if operated too close to windows, garages, or enclosed spaces.
Pro Tip: The Consumer Product Safety Commission reports that portable generators cause an average of 85 carbon monoxide deaths per year in the United States. If you use a portable generator, it must be placed at least 20 feet from your home with the exhaust pointing away from all windows and doors. A standby generator installation eliminates this risk entirely because the unit is permanently placed outdoors with proper clearances.
Portable Generator
Manual
Requires hand-start, extension cords
3 – 10 kW typical output
Standby + Interlock
Semi-Auto
Manual start, panel-level transfer
Select circuits powered
Recommended
Standby + ATS
Automatic
Detects outage, starts in 10 – 30 sec
Whole-home or essential circuits
What Your Electrician Checks Before a Backup Generator Installation
A backup generator installation isn’t a drop-and-go project. Because a standby generator ties directly into your home’s electrical panel and fuel system, your electrician must first verify that the installation is safe, code-compliant, and properly sized. Specifically, a professional site survey covers these critical items:
Professional Site Survey Checklist
Load Calculation: Your electrician calculates the total electrical demand of the circuits you want to power during an outage. This determines the minimum generator size in kilowatts. Undersizing causes the generator to overload and shut down when you need it most. Additionally, the NEC requires that generator circuits be sized properly to prevent overheating and fire hazards.
Transfer Switch Selection: Every backup generator installation requires a transfer switch to safely isolate your home from the utility grid. An automatic transfer switch (ATS) monitors utility power and handles everything automatically. A manual interlock kit is more affordable but requires you to physically switch the power source. For homes with well pumps, sump pumps, or medical equipment, an ATS is strongly recommended.
Fuel Source Verification: In West Central Minnesota, most backup generator installations run on propane. Your electrician and propane provider will confirm that your existing tank has adequate capacity – or recommend an upgrade. Natural gas connections, where available, provide unlimited fuel without delivery logistics.
NEC Placement Requirements: The National Electrical Code and local ordinances dictate minimum clearances from windows, doors, property lines, and soffit vents. Your electrician identifies the optimal pad location that satisfies code while minimizing the wire run from the generator to your panel.
Panel Capacity & Condition: If your panel is older, full, or undersized (100-amp service is still common in our area), the electrician may recommend a panel upgrade as part of the backup generator installation to ensure everything works together safely.
Electrical Permit & Inspection: Every backup generator installation in Minnesota requires an electrical permit from the Department of Labor and Industry. A state inspector reviews the transfer switch, grounding, and circuit connections before the system is approved. At Bright Haven Electric, we handle all permits and inspections.
Transfer Switch Requirements & Safety
Critical Safety
Why Backfeeding Is Deadly
Some homeowners attempt to connect a portable generator directly to their panel by plugging it into a dryer outlet or wiring it without a transfer switch. However, this practice – called backfeeding – is illegal, violates the National Electrical Code, and can electrocute utility lineworkers trying to restore power on the lines outside your home. Consequently, a transfer switch isn’t optional. It’s a code requirement that physically prevents your generator from energizing the utility grid.
Bottom Line: Every backup generator installation – whether standby or portable – must include an approved transfer switch or interlock kit. At Bright Haven Electric, every generator install includes a proper transfer mechanism, electrical permit, and state inspection.
The cost of a backup generator installation depends on three main factors: specifically, the generator size, the transfer switch type, and the complexity of the electrical and fuel connections. As a result, pricing varies significantly. Below are typical ranges for our West Central Minnesota service area:
Essential Circuits Only
10 – 14 kW
Well pump, furnace, fridge, lights
Most affordable option
Extended Coverage
16 – 20 kW
Essentials + AC, washer/dryer
Most popular for homeowners
Whole-Home
Full Home Coverage
22 – 24+ kW
Every circuit including EV charger
Complete Safety & Reliability
Co-Op Rebates & Incentive Programs
Several electric cooperatives in West Central Minnesota offer rebate programs for qualifying backup generator installations. In particular, these incentives help offset the upfront cost and are available for both standby and whole-home units. As a result, we regularly work with these providers:
Agralite Electric Cooperative – Rebate programs for qualifying standby generator installations
Runestone Electric Association – Generator and off-peak equipment incentives available
Minnesota Valley Electric Cooperative (MVEC) – Backup power rebate programs
Lyon-Lincoln Electric Cooperative – Generator installation incentives
Kandiyohi Power Cooperative – Contact for current standby generator programs
How to Evaluate Your Home for a Backup Generator Installation
Time needed: 20 minutes
Before scheduling a standby generator setup, you can evaluate your home’s readiness yourself. This walkthrough covers the key factors your electrician will assess during the initial site survey so you know what to expect and can make informed decisions about sizing and placement.
Determine your essential circuits
First, walk through your home and list every appliance and system that must stay on during a power outage. At a minimum, most homeowners want their well pump, refrigerator, furnace blower, sump pump, and a few lighting circuits. If you also want your HVAC system, electric range, or EV charger, the generator size increases significantly.
Check your fuel source options
Next, determine whether you’ve an existing propane tank or a natural gas line at your property. In rural West Central Minnesota, most homes use propane. If you already have a propane tank for heating, your generator can often share the supply – but your provider may recommend upsizing the tank. Natural gas connections, where available, offer unlimited fuel without tank refills.
Assess your electrical panel capacity
Then, open your panel door and check the main breaker rating – typically 100A, 150A, or 200A. A standby generator requires either an automatic transfer switch or a manual interlock kit installed at the panel. If your panel is older, full, or undersized, your electrician may recommend a panel upgrade as part of the project.
Choose a transfer switch type
Plus, decide between an automatic transfer switch (ATS) and a manual interlock kit. An ATS detects the outage and starts the generator automatically – you don’t have to be home. A manual interlock is more affordable but requires you to physically start the generator and flip the interlock. For homes with sump pumps, well pumps, or medical equipment, an ATS is strongly recommended.
Schedule a professional site survey
Finally, contact a licensed electrician to perform a site survey. The electrician will verify your fuel source, measure the distance from the panel to the proposed generator pad, confirm NEC clearance requirements, and perform a load calculation to size the generator correctly. This step ensures the installation is code-compliant and properly engineered for your home.
Backup Generator Installation FAQ
What size generator do I need for my home?
It depends entirely on what you want to keep running. If you only need essentials – well pump, furnace blower, refrigerator, sump pump, and a few lights – a 10 to 14 kW generator handles that comfortably. If you want whole-home coverage including central AC, an electric range, and an EV charger, you’re looking at 20 to 24 kW or larger. I always run a full load calculation before recommending a size, because undersizing a generator causes it to overwork and fail when you need it most.
How does an automatic transfer switch work?
An automatic transfer switch monitors your utility power 24/7. When it detects an outage, it sends a start signal to your generator. Within about 10 to 30 seconds, the generator starts, reaches operating speed, and the transfer switch disconnects your home from the grid and connects it to the generator. When utility power returns and stabilizes, the ATS switches you back automatically and shuts the generator down. You don’t have to be home for any of this.
Can I install a backup generator myself?
Legally in Minnesota, no – not the electrical portion. A backup generator installation requires a licensed electrician to install the transfer switch, connect the generator to your panel, and pull the required electrical permit. The gas or propane connection also requires a licensed plumber or gas fitter. Beyond the legal requirements, an improperly installed generator can backfeed onto the utility grid and electrocute lineworkers – which is why transfer switches exist and why code requires them.
How loud is a standby generator?
Modern standby generators from Generac, Kohler, and Briggs & Stratton run between 60 and 70 decibels at full load – roughly the volume of a normal conversation. The NEC requires minimum clearances from windows and property lines, and most municipalities have their own setback requirements. During my site survey, I always confirm that the proposed placement meets both code and your comfort level.
Do I need a permit for a generator installation in Minnesota?
Yes. Every backup generator installation requires an electrical permit from the Minnesota Department of Labor and Industry. The permit covers the transfer switch, the dedicated circuit from the generator to your panel, and the grounding system. A state electrical inspector reviews the installation before it’s approved. At Bright Haven Electric, we pull the permit, schedule the inspection, and handle all the paperwork.
What maintenance does a standby generator require?
Most standby generators run a brief automated exercise cycle once a week – usually for 10 to 15 minutes – to keep the engine and battery in ready condition. Beyond that, you need an oil and filter change once a year or every 200 hours of operation, whichever comes first. Air filters and spark plugs follow the manufacturer’s schedule. I recommend an annual maintenance visit to check the battery, coolant (on liquid-cooled units), transfer switch operation, and overall condition.
Stop worrying about the next power outage. Bright Haven Electric installs standby generators throughout West Central Minnesota – including load calculations, transfer switch installation, permitting, and co-op rebate assistance.
Why we leave every jobsite cleaner than when we rolled up on it – and why that standard says more about the quality of our work than any sales pitch ever could.
A clean electrician jobsite tells the homeowner everything they need to know about the quality of the work behind the walls. Not during the project – after. When the truck pulls away and you walk back inside, does the house look like a construction zone, or does it look like nothing ever happened – except the problem is fixed?
At Bright Haven Electric, we follow a simple, non-negotiable standard: every jobsite must be cleaner when we leave than when we arrived. Not “about the same.” Not “we swept up the big pieces.” Cleaner. We bake that standard into every project – from a single outlet replacement to a full whole-home rewire.
This commitment isn’t a marketing slogan. A clean electrician jobsite reflects how we train, how we operate, and what we believe a professional electrical contractor owes the people who trust us inside their homes, farms, and businesses.
100%
of our jobsites receive a full cleanup before we leave – no exceptions
Why a Clean Electrician Jobsite Actually Matters
Some contractors treat cleanup as an optional nicety – something they do if there’s time left in the day. At Bright Haven Electric, we treat it as a core part of the job itself, because maintaining a clean electrician jobsite isn’t just about appearances. Cleanup directly affects safety, code compliance, and the long-term performance of the electrical work behind your walls.
Safety Is Not Optional
Wire clippings, stripped insulation, discarded fasteners, and broken drywall fragments create hazards for everyone in the home – especially small children and pets. A copper wire clipping on carpet stays invisible until someone steps on it barefoot. A discarded wire nut rolling under a dryer seems harmless until it jams a fan motor. Our crew collects every piece of debris, every scrap of wire, and every dropped screw. If it came out of the wall, it leaves in our truck.
Safety Hazard Eliminated
Professionalism Speaks Volumes
When a homeowner hires an electrician, they’re trusting a stranger inside their most personal space. How we treat that space tells them everything they need to know about how we treat the wiring they’ll never see. If the visible work area is messy, careless, and disorganized, what does the work inside the walls look like? Our cleanup tells every customer: the work behind the drywall is just as thorough.
Trust Built Through Action
Code Compliance From Start to Finish
The National Electrical Code and Minnesota state inspections evaluate more than just wire connections. Inspectors assess workmanship quality, labeling, panel organization, and the overall condition of the work area. A clean electrician jobsite signals to an inspector that the contractor takes the craft seriously. Sloppy surroundings invite closer scrutiny – and rightly so.
Inspection-Ready Every Time
Respecting Your Home
You didn’t invite us into your house to create a mess – you invited us to solve a problem. Once the problem is solved, the house should feel exactly like yours again and not like a construction zone. Our crew wears boot covers on finished floors, lays drop cloths under panel work, vacuums drywall dust, wipes down surfaces, and hauls every scrap of material to the truck. Your home isn’t our shop, and we treat it accordingly.
Your Home, Our Respect
Our Clean Electrician Jobsite Process
Saying “we clean up” is easy – anyone can say it. Here is what those words actually mean at Bright Haven Electric. This is our standard clean electrician jobsite process on every single project – residential, commercial, and agricultural.
Our Jobsite Cleanup Checklist
This is the checklist we follow before we close out every project. No exceptions.
All wire clippings and stripped insulation collected – every copper tail, every jacket strip, every piece of Romex sheathing goes into our scrap collection, not your trash
All packaging and material debris removed – box packaging, plastic wrapping, cable ties, mounting hardware packaging, and instruction sheets leave with us
Drywall dust vacuumed and wiped – when we cut into walls or ceilings, we contain the dust with drop cloths and clean up every particle when the work is done
Drop cloths removed and area swept – floor protection goes down before we start and comes up after we finish
Boot covers used on finished floors – hardwood, tile, laminate, and carpet all get the same treatment
Panel areas left clean and organized – no dangling labels, no unlabeled breakers, no debris inside the panel enclosure
Exterior trenching areas graded and restored – when we trench for underground runs, we backfill, compact, and restore the surface grade
All old materials and replaced components hauled away – the breaker we replaced, the old wire we pulled, the damaged conduit we removed – none of it stays at your property
Final walkthrough with the customer – we walk through every area where we worked with the homeowner before we leave to confirm they’re satisfied
“If the homeowner has to pick up a single wire clipping after we leave, we haven’t done our job. The electrical work is only half the job. The other half is making sure the house looks like we were never there – except the problem is gone.”
– Chadwick Ferguson, Master Electrician & Co-Owner, Bright Haven Electric LLC
Where a Clean Electrician Jobsite Matters Most
Some jobs generate more debris than others. That’s the nature of electrical work – sometimes the crew has to cut into a ceiling, pull wire through a crawlspace, or trench across a yard. The mess is unavoidable, but what happens next defines the contractor. Here are the projects where our clean jobsite commitment makes the biggest difference:
Panel Upgrades & Service Changes
A 200-amp service upgrade generates significant debris – old breakers, stripped wire ends, conduit cuttings, mounting hardware, and drywall dust. We contain the mess throughout the installation and leave the panel area spotless. The panel itself is labeled, organized, and the surrounding area looks better than when we started.
Whole-Home Rewires
A complete rewire or knob-and-tube replacement touches every room in the house, which means cutting into walls and ceilings throughout the home. Our crew sections off work areas, contains dust with barriers and drop cloths, and performs detailed cleanup in every room. By the time we finish, the only evidence of the rewire is the shiny new panel and the updated outlets.
Agricultural & Pole Barn Wiring
Farm wiring projects – grain bin circuits, irrigation pump panels, and pole barn wiring – involve significant trenching, conduit cutting, and panel work. Our team backfills trenches properly, compacts the soil, and restores the grade. Inside the barn or shop, every wire scrap gets collected, the floor gets swept, and the panel area stays organized. Your shop is your workplace, and we respect it the same way we respect a living room.
EV Charger Installations
An EV charger installation often involves running a new circuit from the main panel to the garage – through walls, ceilings, or crawlspaces. That means drywall penetrations, wire pulling, and mounting hardware. We patch access points, vacuum the debris, and mount the charger with precision. When we hand you the keys to your new charging setup, the garage looks better than before we arrived.
The “Bee Clean” Jobsite Philosophy
Why “bee clean”? Because bees rank among the most efficient workers in nature. Every honeybee in a hive serves a purpose, nothing goes to waste, and the structures they build are geometrically perfect. When the work finishes, the hive stays spotless. That’s exactly how we approach every clean electrician jobsite we deliver.
Our name – Bright Haven – comes from our family farm, where we raise bees and grow food on the same land we serve. The care and precision we apply to our farm carries directly into your home. Clean work isn’t a line item on an invoice – it’s a philosophy that runs through everything we do.
What “Bee Clean” Means in Practice
Here is what sets our approach apart from the contractor who “cleans up” by kicking debris under the workbench:
Clean wiring inside the walls: Neat, consistent wire runs with proper stapling, correct bend radius, and no excess wire bundled up inside boxes. If the inspector pulls a cover plate, the work behind it should look like it belongs in a textbook.
Clean panels: Every breaker is labeled. Every wire is routed neatly. Knockouts are sealed. The dead front sits flush. A clean panel is a safe panel – and it tells the next electrician who opens it that a professional was here.
Clean trenches: Underground runs are buried to code depth, backfilled in layers, and the surface is graded to match the surrounding terrain. No piles of dirt left for the homeowner to level out.
Clean communication: We explain what we did, why we did it, and what to watch for going forward. No jargon. No upselling. Just straight answers from a working electrician with over 20 years of experience.
What to Expect From Our Clean Jobsite Standard
From the moment we answer the phone to the moment we pull out of your driveway, here is exactly what you should expect from our team:
1. Clear Communication From the Start
When you request an estimate, we ask questions, listen carefully, and provide a written scope of work before we show up. You’ll know what we’re doing, why we’re doing it, and what it will cost before any work begins. No surprises.
2. Your Home Is Protected From Day One
Our crew arrives with drop cloths, boot covers, and containment materials. Before any tools come out of the truck, we protect your floors, furniture, and walls. If the project requires cutting into drywall, dust barriers go up first. Your home isn’t a construction site until we make it one – and we undo every bit of it before driving away.
3. Work Is Done Right the First Time
Every installation follows the National Electrical Code and Minnesota state requirements. We pull permits when required, schedule inspections, and build to a standard that passes on the first attempt. We don’t cut corners on the work and we don’t cut corners on the cleanup. Our 1-year workmanship guarantee backs every project.
4. Final Walkthrough Before We Leave
When the work is complete and the cleanup is done, we walk through every area we touched with the homeowner. We show you what was done, demonstrate the new installations, answer your questions, and confirm you’re completely satisfied before we load the truck. If something doesn’t meet your expectations, we address it on the spot.
Why This Matters in West Central Minnesota
In a rural service area like ours, reputation grows through word of mouth – not advertising. After we leave a home in Appleton cleaner than we found it, that homeowner tells their neighbor in Milan. After we restore a trenched yard in Montevideo to better-than-original grade, that farmer mentions it at the co-op.
This community knows each other, and our reputation rides on every single job. That’s exactly why we hold ourselves to a clean electrician jobsite standard – because in West Central Minnesota, your work is your reputation, and we intend to keep ours spotless.
If you need a panel upgrade, a whole-home rewire, EV charger installation, or any residential, commercial, or agricultural electrical work – Bright Haven Electric LLC leaves every jobsite cleaner than we found it. That’s a promise.
Gas prices keep climbing. A home EV charger installation lets you wake up to a full battery every morning – for a fraction of what you’d pay at the pump. Here’s everything you need to know.
A home EV charger installation is the single most important upgrade for any EV owner. Instead of crawling along at 3 to 5 miles of range per hour on a wall outlet, a Level 2 charger adds 30 to 45 miles per hour. As a result, you plug in after dinner and wake up to a full battery. In addition, off-peak charging rates from your local co-op can cut your nightly fuel cost to just a few dollars.
Level 1 vs. Level 2 Home EV Charger Installation
Every EV comes with a basic Level 1 cord that plugs into a standard 120-volt outlet. While it technically works, it’s painfully slow for daily drivers. Consequently, most homeowners choose a Level 2 charger. It uses a 240-volt circuit – the same voltage as your electric dryer – and is the standard for home charging.
Comparison
Charging Speed Breakdown
Level 1 (120V – Standard Outlet):
Adds about 3 to 5 miles of range per hour. For example, a depleted 60 kWh battery takes roughly 50+ hours to fully charge. In other words, your car stays plugged in for over two full days. Therefore, Level 1 is only practical for plug-in hybrids or as a backup.
Level 2 (240V – Dedicated Circuit):
In contrast, a Level 2 charger adds approximately 30 to 45 miles of range per hour depending on the amperage. The same 60 kWh battery that takes 50+ hours on Level 1 charges fully in just 6 to 8 hours on a Level 2 charger. Plus, you can program your car or charger to begin charging at 10 PM when off-peak rates kick in.
Pro Tip: Most EV owners never charge from zero to full. A typical evening plug-in adds back 30 to 60 miles. That takes about 1 to 2 hours on Level 2. As a result, the charger becomes invisible in your routine.
Home EV Charger Installation Pays for Itself
The financial case for a home EV charger installation is strong – especially with gas prices trending upward. As a result, more homeowners are switching. Below is a cost comparison for driving 270 miles:
Gasoline
~$31.50
9 gallons × $3.50/gal
30 MPG average
EV – Standard Rate
~$8 – 10
~70 kWh × $0.12/kWh
Typical MN residential rate
Best Value
EV – Off-Peak Rate
~$3 – 5
~70 kWh × $0.04 – 0.06/kWh
Co-op off-peak schedule
Real Savings: Driving 12,000 miles per year? Switching to off-peak EV charging saves roughly $1,100 to $1,200 per year in fuel costs. Plus, the charger install typically pays for itself within 12 to 18 months.
What Your Electrician Checks Before an EV Charger Install
A home EV charger installation isn’t a plug-and-play project. A Level 2 charger draws 30 to 60 amps continuously for hours. As a result, your electrician must confirm your home can handle the load. Specifically, a professional electrical safety audit covers these items.
Professional Load Calculation
Panel Amperage: Your main breaker rating (100A, 150A, or 200A) determines how much total capacity you’ve. In particular, homes with 100-amp service often require an upgrade to safely support a Level 2 charger alongside existing circuits.
Available Breaker Space: A Level 2 EV charger requires a dedicated double-pole breaker (typically 40A or 50A). As a result, your electrician will check whether your panel has open slots – or whether tandem breakers or a sub-panel are needed.
Wire Run Distance: The distance from your panel to the charger location determines the wire gauge and conduit requirements. Longer runs require heavier (and more expensive) copper conductors to prevent voltage drop.
NEC Compliance: The National Electrical Code requires that EV charging circuits be sized at 125% of the charger’s maximum continuous load. For instance, a 40-amp charger requires a 50-amp breaker and corresponding wire gauge.
Installation Method: Additionally, your electrician will recommend either a hardwired connection (permanent, cleaner, supports higher amperages) or a NEMA 14-50 outlet (flexible, allows charger portability). Both methods are code-compliant when installed correctly.
Important
Why DIY Installation Is Dangerous
An EV charger draws heavy continuous amperage for hours. This is very different from the brief loads most household circuits handle. As a consequence, undersized wiring or an overloaded panel can create a hidden fire hazard. Also, many manufacturers require a licensed electrician to keep your warranty valid.
Bottom Line: A professional load calculation protects your home and preserves your warranties. At Bright Haven Electric, every install includes a load calculation and city permit.
Indoor vs. Outdoor Home EV Charger Installation
Many homeowners wonder: garage or exterior wall? In most cases, a garage install is simplest. It protects the charger from weather and shortens the wire run. However, outdoor-rated chargers (NEMA 4 or NEMA 3R) handle Minnesota winters without issue. Regardless of placement, you need a dedicated circuit with proper conduit.
Local Rebates – Save Up to $500
In addition to fuel savings, several electric cooperatives in West Central Minnesota offer substantial rebates for qualifying Level 2 EV charger installations. As a result, we regularly work with these providers and can help ensure your installation qualifies:
Agralite Electric Cooperative – Up to $500 for qualifying installations
Runestone Electric Association – Off-peak EV rate programs available
Minnesota Valley Electric Cooperative (MVEC) – Rebate programs for Level 2 chargers
Lyon-Lincoln Electric Cooperative – EV charger incentives available
Kandiyohi Power Cooperative – Contact for current EV charger programs
How to Evaluate Your Home for a Level 2 EV Charger
Time needed: 15 minutes
Before scheduling an EV charger installation, you can quickly evaluate your home’s electrical readiness yourself. This simple walkthrough helps you understand what your electrician will check and whether a panel upgrade might be necessary.
Check your electrical panel’s amperage rating
First, locate the main breaker at the top of your electrical panel. It will be labeled with a number – typically 100A, 150A, or 200A. A Level 2 EV charger generally requires a dedicated 40A to 60A circuit. If you’ve 100-amp service, you’ll very likely need a panel upgrade before installation.
Count available breaker slots
Next, open your panel door and count the empty breaker slots. A Level 2 EV charger needs a dedicated double-pole breaker, which occupies two slots. If your panel is completely full, your electrician may need to add a sub-panel or consolidate tandem breakers to create space.
Measure the distance from panel to charging location
Then, estimate the distance from your breaker panel to where you plan to mount the charger – usually the garage wall closest to where you park. Longer wire runs require heavier gauge copper wire, which increases material cost. Keeping the charger as close to the panel as possible is the most cost-effective approach.
Check for local co-op rebates
Plus, many electric cooperatives in West Central Minnesota offer up to $500 in rebates for qualifying Level 2 EV charger installations. Contact your provider – Agralite, Runestone, MVEC, or Lyon-Lincoln – to confirm eligibility before scheduling the work so you can maximize your savings.
Schedule a professional load calculation
Finally, contact a licensed electrician to perform a formal load calculation. This calculation determines whether your panel can safely handle the added demand of an EV charger alongside your existing circuits – your HVAC, dryer, range, and water heater. This is the step that separates a safe installation from a dangerous one.
EV Charger Installation FAQ
What’s the difference between a Level 1 and Level 2 EV charger?
A Level 1 charger is the cord that came with your car – it plugs into a standard 120-volt household outlet and only adds about 3 to 5 miles of range per hour. Realistically, that’s fine for a plug-in hybrid, but it’s painfully slow for a full-battery EV. A Level 2 charger runs on 240 volts (like your electric dryer) and adds 30 to 45 miles of range per hour. For most of my customers, that means plugging in when you get home and waking up to a full battery.
Will I need to upgrade my electrical panel for an EV charger?
It depends on your current service size. If you’ve 200-amp service with available breaker space, we can usually install a Level 2 charger without touching the panel. But if you’ve older 100-amp service – which is still extremely common in West Central Minnesota – you’ll almost certainly need a service upgrade first. I always run a formal load calculation before quoting the job, so there are never surprises.
How much does it cost to charge an EV at home compared to gasoline?
This is the number that gets people’s attention. At typical Minnesota residential rates (around $0.12 per kWh), charging a mid-size EV like a Tesla Model 3 costs roughly $8 to $10 for a full charge – that’s about 270 miles of range. The same distance in a gas-powered car averaging 30 MPG at $3.50 per gallon costs approximately $31.50. If you’re on an off-peak rate from your co-op, your EV charging cost drops even further – sometimes below $4 for a full charge.
Can I install an EV charger outdoors?
Absolutely. Many of the chargers we install are outdoor-rated (NEMA 4 or NEMA 3R enclosures) and handle Minnesota winters without issue. We also install weatherproof NEMA 14-50 outlets for plug-in chargers. The key is proper conduit, a weatherproof disconnect, and making sure the unit is mounted on a solid surface out of the path of snowplows and roof runoff.
Can you install any brand of EV charger?
Yes. We install Tesla Wall Connectors, ChargePoint Home Flex, Emporia, JuiceBox, Grizzl-E, and pretty much any UL-listed Level 2 EVSE on the market. We’re also happy to recommend a charger based on your vehicle, your panel, and whether you want smart scheduling features or prefer a straightforward plug-and-go unit.
Are there rebates available for EV charger installation in West Central MN?
Yes – and they’re significant. Several local electric cooperatives offer up to $500 for qualifying Level 2 installations. We work with Agralite, Runestone, MVEC, Lyon-Lincoln, and Kandiyohi Power regularly and can help you navigate the paperwork. There may also be federal tax credits available depending on the year. I always recommend checking with your provider before scheduling so we can make sure the install qualifies. See our full breakdown: EV Charger Rebates in West Central Minnesota.
Stop paying $3.50+ per gallon. Bright Haven Electric installs Level 2 EV chargers throughout West Central Minnesota – including load calculations, permitting, and rebate assistance.
From severe thunderstorms to grid fluctuations, your home’s expensive electronics and smart appliances are constantly at risk. Whole-home surge protection gives you confidence in your electrical system.
Modern homes securely hold dozens of highly sensitive microprocessors, which makes them incredibly vulnerable. For example, your refrigerator, HVAC system, washer, and LED lights contain delicate circuit boards that remain highly sensitive to incoming voltage spikes. A sudden power surge can easily destroy these fragile components instantly. Typically, a nearby lightning strike, an overloaded municipal grid, or a failing neighborhood transformer triggers these dangerous electrical events. While power strips reliably remain common in households, true comprehensive protection happens exclusively at the main breaker panel. Therefore, to ensure complete safety, Bright Haven Electric highly recommends installing whole-home surge protection.
Whole-Home Surge Protection vs. Point-of-Use Strips
Comparison
Layered Protection Strategy
Whole-Home Surge Protectors:
First, a licensed professional effectively installs these powerful limiters directly at your main electrical panel. As a result, these robust units successfully intercept exceptionally large surges coming from outside before the dangerous energy ever enters your home’s wiring. Plus, they successfully protect major hardwired appliances including central AC systems, electric furnaces, and wall ovens, specifically since you can’t plug these high-draw devices into a standard living room power strip.
Point-of-Use Surge Protectors:
Meanwhile, these are your standard indoor power strips. Even with a whole-home unit actively working to block the bulk of an attack, up to 15% of a massive surge can occasionally leak through the system. In addition, large internal appliance motors turning on and off constantly generate surprisingly small internal surges. Therefore, everyday power strips actively act as a necessary final localized barrier for maintaining ultra-sensitive electronics like thin flat-screen TVs and highly expensive desktop computers.
Pro Tip: For complete maximum safety, we strongly recommend implementing a layered approach throughout your home. Consequently, you should definitively pair a whole-home unit at the main panel with high-quality dedicated power strips for your home offices and entertainment centers to protect against all threats.
New NEC Code Requirements for Whole-Home Surge Protection
The National Electrical Code (NEC) now strictly requires whole-home surge protection to properly secure the increasingly complex electronics residing inside modern homes. Consequently, this critical safety measure is naturally no longer just a friendly optional recommendation from your electrician.
NEC 2020 & 2023 Mandates
NEC 2020 (Section 230.67): First, the NEC strictly mandates that you must reliably install a Type 1 or Type 2 Surge Protective Device (SPD) on all completely new or newly replaced dwelling unit electrical services.
NEC 2023 (Section 230.67 & 409.70): Plus, the updated national code specifically requires active, continuous SPD protection specifically covering crucial HVAC controls. In addition, the code strategically expands these critical safety requirements to now fully include large hotels, university dorms, and local nursing homes.
Location Requirements: To effectively block external massive power surges, master electricians must skillfully install the surge protector directly at the main service panel, or alternatively, in an approved location immediately adjacent to it.
Progressive Upgrades: Modern HVAC system modifications structurally require extensively upgraded surge protection. Therefore, if you replace your aging furnace or standard AC unit, local city inspectors will absolutely trigger the strict requirement to install a whole-home SPD at your main house panel in order to remain fully and legally code-compliant.
Important
Manufacturer Warranty Clauses
Many reliable high-quality surge protectors happily offer truly excellent appliance replacement warranties directly to consumers. Specifically, the protective companies will gladly cover immensely costly appliance damages if a massive overwhelming surge surprisingly bypasses the dedicated device. However, there’s a very critical hidden catch: almost all top mainstream manufacturers strictly require a fully certified, formally licensed electrician to professionally install the SPD and simultaneously pull proper city installation permits before those companies will actively honor their lucrative appliance replacement clauses.
Keep in Mind: Improper unpermitted DIY installations will automatically and instantly void the original manufacturer’s important warranty. Therefore, you must always hire a professional licensed electrician to properly ensure your robust property protection and financial warranty remain perfectly guaranteed.
How to Check Your Whole-Home Surge Protector
Time needed: 10 minutes
First, a surge protector absorbs dangerous voltage spikes to keep your home safe. However, over time, the device actively sacrifices itself to block these surges and will eventually need replacement. Therefore, here is how you can easily verify its operational status.
Locate your electrical panel
First, find your main electrical panel. You can typically locate it in a garage, basement, or utility room. However, you shouldn’t open the inner metal panel door covering the breakers.
Identify the surge protector device
Next, look for a small box-like device. Electricians usually mount it immediately outside the panel or carefully make it visible through a small cutout. Additionally, it generally features obvious indicator lights on the front.
Check the indicator lights
Then, examine the bright LEDs on the device. For example, a solid green light usually indicates you’ve active protection. Conversely, if the light is red or completely off, the unit has likely taken a massive hit and needs immediate attention.
Know when to replace
Finally, you must quickly replace the unit if the indicator actually shows a fault. Plus, you should proactively replace it after any major lightning event nearby, or after 10 years of consistent service regardless of the light’s current status.
Common Questions About Surge Protection
Do I still need power strips with surge protection if I have a whole-home unit?
Yes. A whole-home surge protector completely handles the large voltage spikes coming from outside. Meanwhile, point-of-use power strips handle any residual noise that somehow makes it through. Therefore, we strongly recommend layered protection for all highly sensitive electronics.
Does a whole-home surge protector protect against a direct lightning strike?
No. While these robust units are highly effective against indirect surges from nearby strikes or grid fluctuations, a direct lightning hit to your home carries entirely too much raw energy. Consequently, no standard surge protector can successfully block a massive direct strike.
How long does a whole-home surge protector last?
Typically, the dedicated device reliably lasts between 5 to 10 years. However, this lifespan largely depends on the exact model and the total amount of surges it has actively absorbed over time. Generally, replacing the worn protector remains incredibly inexpensive compared to replacing your home’s costly smart appliances.
Will whole-home surge protection secure my HVAC, refrigerator, and washer/dryer?
Yes, absolutely. Because professional electricians install whole-home units directly at the electrical panel, they automatically cover all hardwired appliances. In addition, they reliably secure every single dedicated circuit throughout the entire house.
Is whole-home surge protection typically covered by homeowners insurance?
Many home insurance policies indeed happily cover sudden surge damage. First, however, fully installing a whole-home surge protector may actually help significantly reduce your likelihood to file damage claims. Plus, this intelligent, proactive installation could specifically lower your monthly policy premiums. Therefore, it’s always best to check directly with your trusted insurance provider.
Are Your Electronics Protected?
Therefore, don’t wait for a severe storm to finally discover your expensive appliances sorely lack protection. Instead, the expert electricians at Bright Haven Electric can skillfully install whole-home surge protection in under an hour.
Dead outlets, tripped breakers, and switches that don’t seem to do anything – this step-by-step troubleshooting guide covers the fixes most homeowners get wrong.
Most homeowners know they need to “flip the breaker” or “press the button” when an outlet stops working. However, when the standard fix doesn’t work, most people are stuck. Learning how to properly reset a GFCI outlet and tripped breaker is one of the most practical electrical skills a homeowner can have – and getting it wrong can mean hours of unnecessary frustration or an avoidable service call.
This guide walks you through the correct reset procedures step by step, then covers six real-world troubleshooting scenarios where GFCIs, breakers, and switches interact in ways that confuse even experienced homeowners. If you want to understand the deeper theory behind how breakers actually work, see our companion post: Circuit Breaker Tripping: Overloads & Short Circuits.
How to Reset a GFCI Outlet
Time needed: 10 minutes
A GFCI (Ground Fault Circuit Interrupter) outlet protects you from electrical shock by shutting off power when it detects current leaking to ground. When it trips, the RESET button pops out and all outlets protected by that GFCI go dead. As a result, a dead outlet in your bathroom may actually be controlled by a GFCI in your kitchen or garage. Here’s how to reset a GFCI outlet correctly:
Locate the GFCI Outlet
The GFCI protecting a dead outlet may not be in the same room. Check bathrooms, kitchens, garages, basements, and outdoor outlets for the distinctive rectangular buttons labeled TEST and RESET. In particular, one GFCI can protect multiple outlets downstream – so the culprit might be two rooms away.
Check the Indicator Light
Many modern GFCIs have a small LED indicator. A green light typically means the outlet has power and is protecting correctly. A red light or no light usually means the GFCI has tripped or lost power. Consequently, this is the fastest way to confirm you’ve found the right GFCI.
Press RESET Firmly
Push the RESET button in firmly until you hear and feel a solid click. If the button won’t stay in, the GFCI is either still detecting a fault or it has no power – see Troubleshooting Scenario 1 below.
Test the Outlet
Plug in a lamp or use a GFCI outlet tester to confirm power has been restored. Plus, check any downstream outlets that were also dead – they should all be live again.
Verify the Protection Works
Press the TEST button – the GFCI should trip immediately and kill power. This confirms the protection mechanism is functioning. Then press RESET again to restore power. You should test your GFCIs monthly to ensure they’re still protecting you.
How to Reset a Tripped Circuit Breaker
When a circuit breaker trips, it doesn’t go fully to the OFF position. Instead, the handle moves to a middle position – between ON and OFF. This is the detail most homeowners miss, and it’s the reason the breaker “won’t go back on.” Here’s the correct procedure to reset a tripped breaker:
1
Find the Tripped Breaker
Open your breaker panel door. Look for the breaker with its handle in the middle position – it won’t be lined up with the others. In some panels, a small orange or red indicator may also be visible on the tripped breaker.
2
Push the Handle Firmly to OFF
This is the step most people skip. You must push the handle all the way past the middle position to the full OFF position first. You’ll feel and hear a mechanical click – that’s the internal trip mechanism resetting its latch. Without this step, the breaker can’t re-engage.
3
Push the Handle Back to ON
Now push the handle firmly from OFF to ON. The breaker should stay in the ON position and power should be restored to the circuit.
4
If It Trips Again Immediately – Stop
If the breaker trips again the moment you flip it back on, don’t keep resetting it. A breaker that trips immediately indicates an active fault on the circuit – a short circuit, ground fault, or failed device. Repeated forced resets can damage the breaker and escalate the hazard. Instead, call a licensed electrician.
6 Scenarios That Stump Most Homeowners
The procedures above work for straightforward trips. However, electrical systems are interconnected – and in real homes, GFCIs, breakers, and switches interact in ways that create confusing problems. Below are six real-world scenarios we encounter regularly on service calls across West Central Minnesota.
Scenario 1
Tripped Breaker + Downstream GFCI Won’t Reset
What you see:
A breaker tripped. You reset it (OFF → ON). But now a GFCI outlet downstream on that same circuit is dead, and pressing RESET does nothing – the button won’t click in.
Why this happens:
When the breaker tripped, the GFCI lost power and tripped simultaneously. Because a GFCI needs line voltage flowing through it to re-engage its internal sensing circuit, it can’t reset without power. As a result, if you try to reset the GFCI while the breaker is still tripped, the button won’t latch.
The fix: Reset the breaker first (OFF → ON) to restore power to the circuit. Then go to the GFCI and press RESET. It should now click in and restore power to everything downstream.
Scenario 2
The Breaker Handle Won’t Stay On
What you see:
The breaker handle is sitting in a weird middle position – not ON, not OFF. You push it toward ON, but it immediately springs back to the middle.
Why this happens:
When a breaker trips, the internal trip mechanism moves to a latched “tripped” state. The handle lands in the middle position as a visual indicator. However, pushing directly from the middle toward ON does not reset the internal latch – so the mechanism blocks re-engagement and the handle springs right back.
The fix: Push the handle firmly past the middle to full OFF. You’ll feel a distinct mechanical click – that’s the trip mechanism resetting. Only then can you push it back to ON. This is the single most common breaker reset mistake homeowners make.
Scenario 3
Two GFCIs on the Same Circuit – Upstream Blocks Downstream
What you see:
An outlet goes dead. You find a GFCI in the kitchen and press RESET – it clicks in, but the dead outlet still has no power. You check the breaker panel and nothing is tripped.
Why this happens:
There’s a second GFCI wired upstream on the same circuit – often in the garage, basement, or another bathroom. Because of a wiring error, one GFCI is installed in the “load” path of the other, putting them in series. When the upstream GFCI trips, everything downstream loses power – including the downstream GFCI, which can’t reset without voltage from its own line terminals.
The fix: Find and reset the GFCI that’s first on the circuit. If you don’t know which one is upstream, reset every GFCI in the house – kitchens, bathrooms, garage, basement, outdoors. The upstream reset restores power to everything downstream.
Pro tip: Two GFCIs in series is almost always a wiring error from a previous installer. Call a licensed electrician to correct the circuit so each GFCI only protects its own downstream outlets.
Scenario 4
The 3-Way Switch That Only Works From One End
What you see:
You’ve a light controlled by two switches – one at the top of the stairs and one at the bottom (or each end of a hallway). The light works fine from one switch, but the other switch does nothing. Or it only works when the other switch happens to be in a certain position.
Why this happens:
A 3-way switch works by routing power through one of two internal “traveler” paths. Both switches must work together to complete the circuit. When the internal wiper contact inside one switch wears out or loses reliable contact with one of the two traveler terminals, the circuit only completes in certain switch-position combinations. In other positions, the electricity has no path and the light stays dark.
The fix: This is not a DIY fix – it requires replacing the defective 3-way switch and verifying the traveler wiring is correct. Improperly wired 3-way circuits can also create a shock hazard. Call a licensed electrician to diagnose and replace the failing switch.
Scenario 5
A Light Switch That Kills the Entire Circuit
What you see:
Multiple outlets and lights go dead simultaneously – but nothing is tripped in the breaker panel. Everything seems fine at the panel. The problem comes and goes seemingly at random.
Why this happens:
Somewhere in the circuit, a wall switch is installed on the hot (line) conductor feeding the entire branch circuit – not just a single light fixture. This is sometimes called “switched power.” When someone flips that switch off (perhaps in a hallway, closet, or entryway), it cuts power to every device wired downstream of it. Because the breaker panel shows no trip, homeowners assume it’s a panel or wiring failure when it’s just a switch.
The fix: Flip every wall switch in the affected area. One of them is feeding – or killing – the entire circuit. Once you’ve identified it, a licensed electrician can re-wire the circuit so the switch only controls the intended light fixture, giving the rest of the circuit constant power.
Scenario 6
The Mystery Switch & the Half-Hot Outlet
What you see:
There’s a switch on the living room wall that doesn’t seem to do anything – no light turns on, no fan responds, nothing visible happens. Meanwhile, a nearby duplex outlet only works on the bottom receptacle; the top half is always dead no matter what you plug in.
Why this happens:
This is actually a code-compliant, intentional design called a “half-hot” or “split” outlet – and it’s extremely common in rooms without a ceiling light fixture. During installation, the electrician broke the metal tab between the two brass screws on the receptacle, separating the top and bottom into two independent circuits. The bottom half gets constant (always-on) power. The top half is wired through the wall switch – designed for a floor lamp. Because nobody ever plugged a lamp into the top, the switch appears to “do nothing.”
The fix: Flip the mystery switch, then plug a lamp into the top receptacle of the nearby outlet – it should light up. This is working as designed. If you’d prefer the entire outlet to be always-on and don’t need the switch, an electrician can remove the switch from the circuit, reconnect the tab, and give you a full always-on duplex outlet.
Pro tip: If you find a switched outlet that isn’t working, check whether the tab between the top and bottom brass screws has been broken. A broken tab is the telltale sign of a half-hot configuration – and it means the two halves are on separate circuits intentionally.
When to Call an Electrician
Most of the fixes above are safe for homeowners to try. However, the following situations require a licensed electrician – don’t attempt to diagnose these yourself:
A breaker that trips immediately every time you reset it
A burning smell coming from your breaker panel or any outlet
Scorch marks or discoloration on a breaker, bus bar, or outlet face
A GFCI that won’t reset even with power confirmed at the line terminals
Two GFCIs wired in series that keep interfering with each other
A 3-way switch that fails intermittently in certain positions
An upstream switch that kills power to an entire circuit
Any situation where you smell ozone, burning plastic, or see sparks
A GFCI (Ground Fault Circuit Interrupter) is designed to shut off power in milliseconds if it senses electricity leaking out of its intended path – which usually means it’s trying to go through water, or worse, through you.
If it keeps tripping, you usually have one of three things going on: Moisture: Back in Seattle, it was the rain; out here in Minnesota, it’s often snowmelt getting into outdoor boxes. A bad appliance: Whatever you’re plugging into it (a coffee maker, power tool, or hairdryer) might have an internal short. Try unplugging everything to see if it holds. The outlet is worn out: GFCIs don’t last forever. After 10 to 15 years, the internal circuitry goes bad and they become overly sensitive or fail entirely.
What does it mean when a breaker is in the middle position?
When a breaker is sitting in the middle (spongy) position, it means it has tripped. It detected an overload or a short circuit and did its job to prevent a fire. To fix it, you can’t just push it toward “ON.” You’ve to push the lever firmly all the way to the “OFF” position until you feel a click, and then firmly snap it back to the “ON” position. If it trips again immediately, leave it off and call a professional – you’ve got a dead short somewhere.
Can I replace a GFCI outlet myself?
Legally? If you own the home and live in it, Minnesota generally allows homeowners to do their own electrical work. Should you? That depends entirely on your comfort level.
Replacing a GFCI isn’t like replacing a standard outlet. You absolutely must understand the difference between the LINE terminals (bringing power in from the panel) and the LOAD terminals (feeding power to other outlets downstream). If you wire them backward – which I’ve seen DIYers do a thousand times – the outlet might have power, but it won’t protect you from a deadly shock. If you aren’t 100% confident with a multimeter and wiring diagrams, call us at Bright Haven Electric.
Why do I have two GFCI outlets on the same circuit?
This is a classic “handyman special.” When you’ve two GFCIs wired on the same circuit (specifically, if one is wired into the LOAD side of another), they fight each other. We call it “phantom tripping.” If there’s a minor fluctuation, both might trip, and you’ll be running all over the house trying to figure out how to reset your power. You only need one GFCI at the beginning of the circuit to protect all the standard outlets downstream.
How often should I test my GFCI outlets?
The manufacturers and Underwriters Laboratories (UL) recommend testing them once a month. Just push the “TEST” button. You should hear a loud click, and the power to anything plugged in should die. Then push “RESET” to turn it back on. If you press test and the power stays on, the outlet is broken and needs to be replaced immediately.
Why does my light switch only work from one end?
You’re talking about a 3-way switch setup (like at the top and bottom of a staircase). If they only work when one switch is in a specific position, somebody wired it wrong, or one of the switches has failed internally. In a 3-way switch, you’ve a “Common” wire and two “Traveler” wires. If a DIYer mixed up the common wire with one of the travelers during a remodel, it breaks the circuit logic. It’s an easy fix for a seasoned sparky, but can be a real headache to trace if you don’t know what you’re looking for.
What’s a half-hot outlet?
A half-hot (or switched) outlet is a standard duplex receptacle where one half (usually the bottom plug) has constant power for things like alarm clocks or phone chargers, and the other half (usually the top plug) turns on and off with a wall switch. We install these all the time in bedrooms and living rooms that don’t have overhead ceiling lights so you can control a floor lamp right when you walk in the door.
Still Stumped? We Can Help.
If you’ve tried the troubleshooting steps above and the problem persists – or if something doesn’t feel right – don’t take chances. Bright Haven Electric LLC provides expert electrical troubleshooting throughout West Central Minnesota.
Severe storms are more common in the spring and summer, but they can strike any time of year. Knowing what to do – and what not to touch – before and after a storm can save your life, your appliances, and your home.
Storm electrical safety is one of the most overlooked – and most critical – topics for homeowners. Every year, severe thunderstorms, tornadoes, and straight-line winds knock out power to thousands of homes across West Central Minnesota. As a result, the moments after a storm passes are some of the most electrically dangerous moments a homeowner will ever face – yet most people aren’t aware of the hazards hidden under fallen trees and standing water.
This guide covers every critical storm electrical safety step – from assembling a storm kit and protecting your circuits before the storm arrives, to navigating downed power lines, flooded basements, and generator use after the storm passes. In addition, if you also need winter-specific preparation advice, see our companion guide: Prepare for Winter Storms: 7 Tips for West Central MN.
Storm Electrical Safety: Before the Storm
The time to prepare is before the radar turns red. In particular, these five steps take less than an hour and can mean the difference between a minor inconvenience and a serious emergency.
Assemble a Storm Safety Kit
Keep a pre-packed kit with water, battery-operated flashlights, a portable radio, first-aid supplies, and a portable phone charger. Plus, include a written list of emergency phone numbers – especially your electric utility’s outage line. Be prepared for a prolonged outage lasting hours or even days if power lines and distribution equipment sustain heavy damage.
Know Watch vs. Warning
Pay close attention to local weather reports. A tornado or severe storm watch means atmospheric conditions are favorable for dangerous weather to form – stay alert. A warning means dangerous conditions have been observed or are imminent – take shelter immediately. These distinctions can save your life.
Seek Shelter at the First Thunder
Lightning can travel up to ten miles away from the storm that produced it. If you can hear thunder, you’re already within striking distance. Move indoors immediately. Avoid touching plumbing, wired phones, or anything connected to the electrical system during active lightning.
Install GFCI Protection
Ground fault circuit interrupters (GFCIs) detect dangerous ground faults and cut power in milliseconds – before a person can be shocked. Because storms create conditions where water and electricity meet, GFCIs should be installed in bathrooms, kitchens, laundry rooms, basements, outdoor outlets, and anywhere else moisture is likely to be present.
Protect Your Circuits When Power Goes Out
If you lose power during a storm, switch off lights, large electronics, and major appliances to prevent overloading your circuits when power is restored. Otherwise, a sudden surge of demand across multiple devices can trip breakers or damage sensitive electronics. However, leave one lamp or switch on as a signal for when utility power returns.
Storm Electrical Safety: After the Storm
The minutes and hours after a storm passes are the most electrically dangerous. Consequently, downed wires, flooded basements, and damaged equipment create invisible hazards that kill people every year. Most importantly, follow these critical storm electrical safety steps before venturing outside or re-entering damaged areas.
Immediate Outdoor Hazards
Stay Away From Downed Power Lines
Above all, when venturing outside after a storm, stay far away from downed power lines and be alert that tree limbs or debris may hide an energized conductor. Assume every dangling wire is live and deadly. In addition, warn others to stay back and contact your electric utility immediately. Never attempt to move a downed line yourself – even with a non-conductive object.
Drive with Extreme Caution
If you encounter a downed power line while driving, stay in your vehicle, warn others to stay away, and call 911 or your electric utility. Don’t exit the vehicle unless it’s on fire – and in that case, jump clear without touching the vehicle and the ground simultaneously. Additionally, treat every intersection where traffic lights are out as a four-way stop before proceeding.
Re-Entry, Recovery & Backup Power
Check Services Before Re-Entry
Before re-entering storm-damaged buildings or rooms, first ensure all electric and gas services are turned off. Never attempt to turn off power at the breaker box if you must stand in water to reach it. Instead, if you can’t safely access your breaker panel, call your electric utility to shut off power at the meter before entering.
Never Enter Flooded Electrical Areas
Never step into a flooded basement or any area where water is covering electrical outlets, appliances, or cords. Because water is an excellent conductor, any energized equipment in contact with floodwater creates a lethal hazard across the entire water surface. For this reason, never touch electrical appliances, cords, or wires while you’re wet or standing in water.
Have Water-Damaged Equipment Inspected
Don’t use any electrical item that has been submerged or exposed to significant moisture until a qualified electrician has inspected it and confirmed it’s safe to operate. In particular, water damages insulation, corrodes internal wiring, and compromises ground paths. As a result, what looks dry on the outside may be dangerously compromised inside.
Use Generators Safely
When using a portable generator, follow all manufacturer recommendations. Keep it dry, run it outdoors only, and never plug it into a wall outlet or directly into your home’s wiring. Otherwise, doing so can backfeed electricity into utility lines and electrocute lineworkers restoring your power. In contrast, a permanent standby generator should be professionally installed with a transfer switch to prevent backfeeding.
Storm Safety Kit Checklist
Keep this kit in a cool, dry place and make sure every member of your family knows where it’s. Check expiration dates on food and medications at least twice per year.
💧Bottles of Water
🥫Nonperishable Food
🔋Portable Phone Charger
🔦Flashlights
🔋Batteries
🥫Can Opener
🩹First-Aid Supplies
🧴Hand Sanitizer
💊Prescriptions
💊Pain Reliever
🧥Warm Clothing
🛏️Blankets
📻Battery-Operated Radio
🧩Toys, Books & Games
📄Important Documents
💵Cash
🍼Baby Supplies
🐾Pet Supplies
Why GFCIs Are Critical for Storm Electrical Safety
Ground fault circuit interrupters (GFCIs) monitor the current flowing through a circuit and trip in as little as 1/40th of a second if they detect electricity leaking to ground – such as through a person’s body or through water. During and after storms, the risk of ground faults increases dramatically due to flooding, moisture, and damaged wiring.
Where GFCIs should be installed:
Bathrooms and laundry rooms
Kitchens (all countertop outlets)
Basements and crawl spaces
All outdoor receptacles
Garages and workshops
Anywhere water and electricity may meet
If your home lacks GFCI protection in these areas, consider having them installed before the next storm season. Portable GFCI adapters are also available as a temporary solution for unprotected outlets.
Generator Safety: Portable vs. Standby
Portable generators are a common backup power solution, but they must be used correctly to avoid lethal hazards:
Never run a generator indoors – carbon monoxide poisoning kills within minutes in enclosed spaces.
Never plug a generator into a wall outlet or wire it directly into your home’s electrical system. This causes backfeeding – sending electricity out through the utility meter and into the grid, where it can electrocute lineworkers trying to restore your power.
Keep the generator dry – operate it under a canopy or tarp, not in rain or standing water.
Use heavy-duty extension cords rated for the generator’s output to connect individual appliances.
A permanent standby generator should be professionally installed and must include an automatic transfer switch that isolates your home from the utility grid when the generator activates. This prevents electricity from leaving your generator and entering power lines where it can kill line workers. Bright Haven Electric installs and services standby generators throughout West Central Minnesota.
Report Downed Power Lines & Outages
Click on your local utility provider below to view their emergency dispatch number.
If you need storm damage repair, GFCI installation, a standby generator, or a full electrical safety inspection – Bright Haven Electric LLC serves all of West Central Minnesota.
What should I do if I see a downed power line after a storm?
Stay at least 100 feet away – assume it’s live and deadly even if it appears inactive. Don’t attempt to move it with any object. Warn others to keep back, call 911, and then call your electric utility’s emergency dispatch number. If a downed line is touching your vehicle, stay inside and wait for utility crews unless the vehicle is on fire.
Can I plug my portable generator into a wall outlet during a power outage?
Absolutely not. Plugging a generator into a wall outlet causes backfeeding – electricity travels backward through your wiring and out through the utility meter into the grid. This can electrocute lineworkers who are restoring power in your neighborhood. Always connect individual appliances directly to the generator using heavy-duty extension cords, or have a licensed electrician install a manual transfer switch or automatic standby generator.
Why are GFCIs important for storm electrical safety?
Storms bring water into contact with electrical systems – flooded basements, wet outlets, and moisture-damaged wiring. GFCIs detect when electricity leaks to ground (such as through water or a person’s body) and shut off the circuit in as little as 1/40th of a second. They should be installed in bathrooms, kitchens, basements, outdoor outlets, garages, and anywhere moisture and electricity may meet.
Can I use appliances that got wet during a storm?
No – don’t use any electrical appliance, tool, or device that has been submerged or significantly exposed to water until a qualified electrician has inspected it and confirmed it’s safe. Water damages internal insulation, corrodes wiring, and compromises ground paths. Equipment that looks dry on the outside can be dangerously compromised inside.
Should I turn off my breakers during a power outage?
Yes – switch off lights, large electronics, and major appliances at the breaker panel to prevent circuit overload when power is restored. A sudden surge of demand across multiple devices can trip breakers or damage sensitive electronics. Leave one light switch on so you know when utility power returns.
When should I call an electrician after storm damage?
Call an electrician if you notice any of the following: a damaged or leaning electrical mast or weatherhead, a flooded basement with electrical equipment, outlets or switches that were submerged, a burning smell from your panel, or if your utility can’t restore power because your service entrance is damaged. Storm damage electrical repair requires a licensed electrician and typically a new electrical permit.
Paying the Price of Power Theft
Electricity theft isn’t just a crime against the utility company. It puts your appliances, your neighbors, and local lineworkers in deadly danger.
It’s often an “invisible” crime, but the consequences are very real. Someone illegally hooks into a power supply, taps a line that has been disconnected, or straight-up tampers with a meter to avoid recording their electricity usage.
Because legitimate, paying electricity consumers don’t engage in these behaviors, the impact of electricity theft – and specifically the extreme danger it introduces – frequently goes unrecognized until it’s too late.
The Lethal Reality of Stolen Power
Electricity theft isn’t just dangerous for those who steal it. Many thieves pay for the power they steal with their lives due to arc flashes, electrocution, or electrical fires. However, you don’t have to be the one stealing to suffer the consequences: if you’re on the same local transformer or power line as someone stealing electricity, you’re paying the cost of their theft too.
Appliance Destruction
Illegal taps can cause local grid transformers to become overloaded with electric energy. This causes massive voltage fluctuations, which can instantly fry your expensive electronics, HVAC systems, and appliances that are engineered to receive a steady 120V/240V supply.
The Deadly Threat to Lineworkers
Perhaps the most insidious danger of power theft is the concept of backfeeding. Electricity thieves often bypass standard safety disconnects. When grid power goes down, these illegal setups can unknowingly feed energy back into the downed power lines.
This is exceptionally dangerous for utility lineworkers. When they arrive to fix an outage, they assume the power line they’re working on is safely de-energized. An illegal tap feeding power backward turns a routine repair into a lethal trap.
Recognizing Federal Crime
Most electrical theft crimes occur through three primary methods:
Meter Tampering: Breaking utility seals to physically alter the meter mechanisms.
Bypassing Meters: Wiring directly from the line-side (utility) to the load-side (home) using jumper cables behind the meter glass.
Tapping Power Lines: Stripping insulation off overhead drops or underground radials to steal directly from the grid.
Other less frequent crimes include tapping into a neighbor’s premises, self-reconnection without utility consent after a disconnection for non-payment, and illegally electrifying fences. Plus, possessing fraudulent electricity bills or tampering with utility meters is a federal crime punishable by severe fines and prison time.
How You Can Help Prevent Power Theft
Report immediately: Notify your electric utility if you know of an illegally connected consumer.
Never touch the seal: Don’t cut the security seal on your meter base or attempt to alter your own meter.
Do it right:Hire a licensed electrician to apply for and install a legal, code-compliant connection if you need new service.
Stay vigilant: Remain aware of your surroundings and report any suspicious activities near transformers, poles, or meters to your local utility.
Everyone is affected by power theft. Recognizing and reporting illegal activity will help reduce the price we all pay – both financially and in keeping our communities safe.
Report Suspected Power Theft
Click on your local utility provider below to view their emergency dispatch number.
Never risk bypassing the meter yourself. From a service upgrade and a new pole barn wired to a severed line reattached to your mast legally, Bright Haven Electric handles the entire permitting and inspection process.
Downed Wire in Your Yard: Who to Call & What to Do
A fallen power line in your yard isn’t just a hassle – it’s a life-threatening emergency. From keeping your family safe to understanding who pays for the repair, here’s what you need to know about navigating the aftermath of severe weather.
Whether it’s a roaring summer thunderstorm or heavy winter ice weighing on the grid, severe weather in Minnesota often leads to fallen branches and downed power lines. When that line lands in your own backyard, panic can quickly set in. Is it live? Is the house in danger? Will the utility company fix it for free?
Many homeowners are unaware of the extreme dangers posed by downed lines, or the specific emergency electrical repair protocols governing who fixes what. Before you go outside to inspect the damage, read this guide.
100 Feet
The Minimum Safe Distance: Always assume a downed power line is live. Electricity can travel through the ground, especially if it’s wet. Stay at least 100 feet away (roughly the length of two school buses) and warn others to do the same.
West Central MN Utility Contacts
Click on your utility provider below to view their emergency dispatch number for downed power lines.
3 Things to Do Immediately If You Find a Downed Line
If you’ve the unfortunate experience of discovering a downed power line in your yard, don’t panic. Follow these three steps to keep your home, family, and pets safe.
1. Call 911 and the Power Company
Calling 911 should be your immediate first step. After alerting emergency services, call your local utility company to report the downed line. The utility company must cut power at the source to remove the threat of electrocution or fire.
2. Get a Safe Distance Away
Maintain at least 100 feet of clearance. If you’re already outside near the line, shuffle with small steps (keeping both feet on the ground) to move away. This minimizes the risk of ground-current shock. Never walk near puddles or water close to the line.
3. Look for Signs of Fire
Live wires in contact with vegetation can start wildfires or ignite property. From a safe distance, look for sparks, smoke, or flames. Inside your home, check for the smell of burning plastic or ozone, as a line falling could have caused a significant surge to your electronics.
Who Is Responsible? The Utility vs. The Homeowner
One of the most confusing aspects of a downed power line is determining who is responsible for the repair. Homeowners often assume the utility company will arrive, fix everything, and turn the power back on. Unfortunately, that’s not always the case.
The Demarcation Point
In most jurisdictions, the utility company’s responsibility ends at the point of attachment to your home. Here is the breakdown:
The Utility Company: Responsible for the electrical grid, the transformer, the utility pole, and the service drop wire coming from the pole to your house.
The Homeowner: Responsible for the weatherhead, the electrical mast (the pipe running down the side of your house), the meter base enclosure, and the interior panel.
What this means: If a falling tree rips the electrical mast off the side of your house, the utility company will safely disable the power, but they won’t repair your mast. You must hire a licensed electrician to rebuild the mast and secure the meter base before the utility company will restore your power.
The Storm Recovery Process
If your home’s exterior electrical equipment – such as the weatherhead or meter socket – has been ripped down by a falling wire or tree, the road to restoring power follows a specific sequence.
Steps to Restoration
1. Make it Safe: The utility company responds to emergency calls to cut the power and clear the live wire hazard from your yard.
2. Hire an Electrician: You call an electrical contractor (like Bright Haven Electric) to secure permits and rebuild your damaged mast, weatherhead, or meter socket.
3. Electrical Inspection: An electrical inspector from the local jurisdiction or state must physically inspect the electrician’s work and sign off that it’s safe to re-energize.
4. Reconnection: Once the inspector gives the green light, the utility company sends a crew to reattach the service drop and turn your power back on.
Beware of “storm chasers” proposing quick fixes without permits. The utility company won’t reconnect power if the work hasn’t been permitted and passed an official safety inspection.
What If a Power Line Falls on Your Car?
If you’re driving and a wire falls across your vehicle, your life is in immediate danger. Your car’s rubber tires don’t insulate you from a multi-thousand-volt distribution line. The metal frame of your car is currently energized, but as long as you remain inside, you’re acting like a bird on a wire – safe because you aren’t providing a path to the ground.
If A Line Falls on Your Vehicle:
Stay Inside: Don’t exit the vehicle. Call 911 and wait for utility crews to cut the power safely. Warn bystanders to stay far away.
If You Must Exit (Fire Danger): Only exit if your car is on fire. You must jump completely clear of the vehicle, landing with both feet together.
Do Not Touch the Car and Ground Simultaneously: If you touch the metal of the car and the ground at the same time, the electricity will travel through you into the earth, electrocuting you.
Shuffle Away: Once on the ground, don’t take normal steps. Shuffle away with your feet constantly touching each other to prevent voltage gradients moving up one leg and down the other.
Need Emergency Mast Repair?
If severe weather has ripped down your electrical mast or damaged your exterior meter, Bright Haven Electric can help. We coordinate closely with local utility companies and inspectors to rebuild your infrastructure and restore your power as quickly and safely as possible.
You don’t need expensive upgrades or new equipment to lower your electric bill. These simple habit changes cost nothing, take almost no effort, and can save your household $500 or more every year.
The average American household spends about $1,500 per year on electricity according to the U.S. Energy Information Administration. For Minnesota homes – where heating loads run heavy from October through April – that number can climb significantly higher.
The good news? A substantial portion of that bill comes from habits, not hardware. You don’t need to install solar panels or replace your furnace to see real savings. The 21 strategies below require zero investment. They work by changing when, how, and whether you use electricity throughout your day.
We’ve organized these tips into five practical categories based on how your home actually uses power. If you’re looking for upgrade-based strategies – smart thermostats, LED conversions, insulation, or off-peak heating systems – visit our companion guide: 7 Ideas to Reduce Energy Consumption.
$500+
Estimated annual savings from all 21 habit changes combined
Lighting Habits
Lighting accounts for roughly 15% of an average home’s electricity bill. The most expensive light in your house is the one nobody is using but nobody turned off. These three changes alone can shave $30 off your annual bill with no upfront cost.
1. Turn Off Lights When You Leave a Room
It sounds obvious, but most households leave at least two rooms lit with nobody in them. Turning off two 100-watt equivalent bulbs for just two extra hours per day eliminates over 140 kilowatt-hours per year. Build the habit: if you leave, the lights leave with you.
Estimated Savings: ~$15/year
2. Maximize Natural Daylight
A single south-facing window can illuminate 20 to 100 times its own area on a clear day. Open your blinds and curtains during daylight hours instead of relying on overhead fixtures. In Minnesota’s long summer days, you may not need artificial light until 9 PM or later.
Estimated Savings: ~$9/year
3. Use Task Lighting Instead of Overhead Fixtures
A desk lamp drawing 10 watts puts light exactly where you need it. A ceiling fixture drawing 100 watts floods the entire room If you need it lit or not. For reading, hobbies, kitchen prep, and homework, targeted task lighting is dramatically more efficient than general illumination.
Estimated Savings: ~$6/year
Hot Water Habits
If your water heater is electric, heating water is likely the second-largest line item on your bill – roughly 18% of total usage. Every gallon of hot water you don’t use is money you don’t spend heating it. These four changes target your biggest hot water sinks.
4. Cut Showers by One Minute
A standard showerhead delivers about 2.5 gallons per minute. If two people in your household each cut one minute from their daily shower, you save over 1,800 gallons of hot water per year. That’s real, measurable energy your water heater no longer has to produce.
Estimated Savings: ~$30/year
5. Turn the Tap Off While It’s Not in Use
Running hot water continuously while brushing teeth, shaving, or washing hands is a habit that silently inflates your energy bill. A faucet typically flows at 1.5 gallons per minute. Turning it off while you scrub or lather prevents unnecessary water heater cycling and reduces your overall hot water consumption by roughly 5%.
Estimated Savings: ~$19/year
6. Fix Leaking Faucets Promptly
A hot water faucet dripping at one drip per second wastes approximately 1,661 gallons per year. That’s over 1,600 gallons your water heater is warming for absolutely no purpose. Most dripping faucets are caused by a worn washer or cartridge – a repair that typically takes under 30 minutes and a few dollars in parts.
Estimated Savings: ~$9/year
7. Wash Laundry in Cold Water
Roughly 90% of the energy your washing machine uses goes to heating water, not running the motor. Modern detergents are formulated to work effectively in cold water. Switching three loads per week from hot to cold eliminates the heating cost entirely for those loads while delivering clean results.
Estimated Savings: ~$22/year
Phantom Loads & Electronics
Standby power – the electricity devices consume while “off” but still plugged in – is one of the most overlooked sources of household energy waste. The Department of Energy estimates that standby power accounts for 5 to 10 percent of residential electricity use. That’s money leaving your house 24 hours a day with nothing to show for it.
8. Unplug Idle Electronics
Your phone charger, gaming console, cable box, and coffee maker all draw standby power when plugged in but not actively running. These phantom loads add up across dozens of devices. Unplugging electronics you aren’t using – or putting entertainment centers on a switched power strip – can eliminate a significant portion of this waste.
Estimated Savings: ~$50/year
9. Use a Laptop Instead of a Desktop
Desktop computers with monitors typically draw 150 to 300 watts while running. A modern laptop performing the same tasks draws 30 to 60 watts – up to 80% less. If you still have an old desktop tower for general use like email, browsing, and documents, switching to a laptop for two hours a day will noticeably reduce your electricity draw.
Estimated Savings: ~$4/year
10. Retire Unused Screens
That old 42-inch LCD in the spare bedroom or basement that gets watched an hour a day is still costing you. Older display technologies draw more power per inch of screen than modern sets. If you aren’t using it regularly, unplug it entirely or donate it. Consolidate your viewing to one efficient screen.
Estimated Savings: ~$6/year
11. Unplug the Second Refrigerator
A second fridge in the garage or basement is one of the most expensive phantom appliances in any home. Older refrigerators are particularly inefficient, often drawing 400 to 700 kWh per year compared to 250 for a modern unit. If it’s mostly empty, unplug it and use an insulated cooler with frozen water jugs for overflow storage.
Estimated Savings: ~$55/year
Minnesota-Specific Savings Opportunities
West Central Minnesota homeowners face unique energy challenges that make these habits even more impactful:
Winter Heating Loads: Electric baseboard and forced-air systems run hard from October through April. Even small thermostat adjustments during this period translate to outsized savings because your heating system is the single largest electricity consumer in your home during these months.
Off-Peak Rate Programs: Many local cooperatives – including Runestone Electric, Agralite, and Kandiyohi Power Cooperative – offer discounted rates during off-peak hours. Shifting heavy usage (laundry, dishwasher, EV charging) to these windows compounds your savings beyond what habits alone can deliver. See our guide on load management receivers and off-peak wiring.
Summer Cooling Loads: West Central MN summers routinely exceed 90°F. Strategic use of window coverings, fans, and avoiding oven use during peak heat hours reduces air conditioning runtime significantly.
Heating & Cooling Habits
Heating and cooling account for the largest share of electricity usage in most Minnesota homes – often 40% or more of the total bill. These adjustments require zero equipment purchases. They simply change how you interact with the systems you already have.
12. Lower Your Thermostat 2 Degrees
The Department of Energy estimates you save about 3% on heating costs for every degree you lower the thermostat. Dropping it just two degrees – a change most people can’t physically feel – yields roughly 5 to 6% savings. Over a full Minnesota heating season, that’s a meaningful reduction.
Estimated Savings: ~$90/year
13. Turn Off the AC When You Leave
Window air conditioning units and portable ACs draw between 500 and 1,400 watts while running. Turning them off for five hours while you’re away from home – rather than cooling empty rooms – eliminates a substantial portion of your summer cooling cost. Over 60 summer days, this adds up fast.
Estimated Savings: ~$16/year
14. Be Strategic With Window Coverings
In winter, open south-facing curtains during the day to capture free solar heat, then close them at night to insulate. In summer, close blinds on west- and south-facing windows during the afternoon to block direct solar gain. This passive strategy reduces the workload on both your heating and cooling systems year-round.
Estimated Savings: ~$45/year
15. Reduce Kitchen Heat in Summer
Your oven generates significant radiant heat – heat your air conditioner then has to remove. During hot months, grill outdoors, use the microwave, or prepare cold meals instead. A single oven session can raise your kitchen temperature by 10°F or more, forcing additional AC runtime.
Estimated Savings: ~$5/year
Appliance & Kitchen Habits
Your major appliances – refrigerator, washer, dryer, dishwasher, and cooking equipment – collectively represent roughly 20% of your electricity bill. You can’t change how much power they draw, but you can change how often and how efficiently you run them.
16. Run Full Laundry Loads Only
Your washing machine uses the same amount of mechanical energy whether the drum is half-full or completely full. Running one fewer load per week saves the motor runtime, the water heating (if using warm), and the subsequent dryer cycle. Consolidate smaller loads into full ones instead of running partial batches.
Estimated Savings: ~$18/year
17. Air-Dry Laundry When Possible
Your dryer is one of the most energy-hungry appliances in your home, typically drawing 2,000 to 5,000 watts per cycle. In Minnesota’s dry summer months, a clothesline works remarkably well. Even hanging half your weekly loads outdoors instead of running the dryer eliminates a meaningful amount of electricity usage.
Estimated Savings: ~$65/year
18. Add a Dry Towel to Dryer Loads
When you do use the dryer, toss in a clean, dry towel with each wet load. The dry towel absorbs moisture from the surrounding clothes, reducing overall drying time. This shortens each cycle by several minutes and reduces the total number of tumble-dry hours your dryer runs over the course of a year.
Estimated Savings: ~$27/year
19. Optimize Your Refrigerator Temperature
Your refrigerator should maintain 36 to 38°F and your freezer should hold at 0°F. Many households run both colder than necessary, which increases compressor runtime without improving food safety. Check your settings with a simple appliance thermometer. Also verify the door seals are clean and creating a tight closure – worn gaskets force the compressor to work harder.
Estimated Savings: ~$13/year
20. Disable the Dishwasher Heat-Dry
The heat-dry setting on your dishwasher activates a high-wattage heating element at the end of every cycle. Most dishes dry perfectly well with the door cracked open for air circulation. Disabling the heat-dry feature on just one load per day eliminates the energy cost of that heating element entirely.
Estimated Savings: ~$27/year
21. Use Small Appliances Instead of Your Oven
A microwave uses about 80% less energy than a conventional oven for the same heating task. An Instant Pot, slow cooker, toaster oven, or air fryer is similarly more efficient for smaller meals. Reserve your full oven for large batches and holiday meals. Use the right-sized tool for the job.
Estimated Savings: ~$13/year
Ready to Go Beyond Zero-Cost?
Once you’ve established these habits, consider electrical upgrades that deliver even deeper savings:
Whole-Home Energy Monitors: We install monitoring devices that track your electricity usage in real-time, helping you identify which appliances and circuits are consuming the most power. Learn about smart home solutions →
LED Lighting Conversion: Replacing every remaining incandescent and CFL bulb with LEDs can cut your lighting electricity usage by 75%. We can plan and install a complete lighting upgrade for your home.
Off-Peak Wiring & Load Management: If your cooperative offers off-peak rates, we install load management receivers, timers, and transfer switches so your water heater, EV charger, and storage heating systems automatically run during discounted rate windows. Read our full energy reduction guide →
Service Panel Upgrades: Homes with undersized panels can’t safely support modern electrical loads. A 200-amp service upgrade eliminates the capacity bottleneck and supports EV chargers, heat pumps, and future electrification.
Take Control of Your Energy Bills
If you need off-peak wiring, a whole-home energy monitor, LED lighting upgrades, or a panel capacity evaluation – Bright Haven Electric LLC serves all of West Central Minnesota.