
Enterprise Engineering
The Bright Haven network infrastructure is powered by a highly available, self-hosted Kubernetes architecture seamlessly integrated with physical networking hardware and robust perimeter security.

When managing digital infrastructure, stability and speed are paramount. Therefore, we never rely on shared web hosting arrays. Instead, the Bright Haven network infrastructure operates on a deeply optimized private cloud. Ultimately, our multi-layered enterprise architecture provides high availability with layered redundancy, maximum performance, and strong workload isolation and segmentation.
Hardwired by Design: The Core of the Bright Haven Network Infrastructure
Our first rule of networking is profoundly simple: Wi-Fi is a fallback position, not a primary strategy. On an average day, our network dynamically manages up to 60 distinct hosts. However, out of all those devices, only about 6 to 10 ever rely on a wireless connection.
Furthermore, everything from our virtualization hosts to our IoT interfaces is primarily hardwired. This physical connection guarantees zero wireless interference and minimal latency. As a result, we achieve massive throughput and near-bare-metal performance across our Virtual Functions (SR-IOV) within the Bright Haven network infrastructure.
The Technical Foundation of Our Architecture
Powering our high-speed, 10GbE backbone involves advanced logical separation. Specifically, here is how we execute enterprise-grade operations behind the scenes:
Zero Trust & Edge Security
First and foremost, our perimeter is guarded by OPNsense stateful firewalls. These operate alongside IDS/IPS and application-aware filtering where appropriate. Consequently, we expose absolutely no inbound ports to the internet directly. Instead, all public-facing services securely transit through Cloudflare (Zero Trust) Tunnels. This method securely publishes our origins without exposing inbound ports, while leveraging Cloudflare’s edge network for SSL termination, DDoS protection, and optional caching where appropriate.
Hardware Segmentation
Our dual-stack, LAG/LACP-connected Juniper core switch strictly isolates all internal IPv4 and IPv6 traffic via discrete VLANs. By implementing hardware-enforced ACLs and firewall filters alongside Class of Service (CoS) prioritizations, unauthorized traffic is dropped in hardware before it reaches the routing engine. IoT devices, cameras, and core servers remain deeply separated at the silicon layer.
Kubernetes & eBPF
Moreover, our containerized workloads run on an immutable OS (Talos Linux) across a high-availability cluster. For networking, we replaced standard proxies with Cilium’s highly advanced eBPF native routing. We peer BGP directly with our switching fabric within the Bright Haven network infrastructure. This reduces reliance on NAT, avoids common proxy bottlenecks, and lets us utilize BIG TCP to improve throughput by reducing per-packet overhead on high-speed links. Finally, to integrate cleanly with traditional routing domains, we actively publish our BGP routes to OSPF and OSPFv3.
Future Scalability
In addition, we never stop engineering. Future plans include transitioning to a high-density VTEP collapsed spine topology. This will utilize enterprise-grade Broadcom Trident II+/3 silicon for the new core switch. As a result, this will allow us to migrate the current L3 core switch downward to serve as a robust leaf aggregation and access layer.
Containerized Stack
Meanwhile, the websites utilizing the Bright Haven network infrastructure run on an aggressively tuned LEMP-like stack. Each site is processed by decoupled containers leveraging a heavily optimized Nginx proxy. Furthermore, a multi-node highly available Redis cache tier handles object caching. This is entirely governed by custom TCP health checks via an HAProxy frontend.
Advanced Storage Topologies
Additionally, our databases run on distributed, highly available block storage explicitly pinned to fast SSDs for sub-millisecond low-latency I/O. For massive bulk storage, we map our NAS arrays dynamically to multiple virtual machines using `virtio-fs` for high-performance host-to-guest file sharing in scenarios where it outperforms traditional network filesystems.
Hardware Virtualization
Finally, our Proxmox hypervisor nodes interact directly with the physical network via 10GbE DAC (twinax) cabling. By provisioning our virtual machines with dedicated SR-IOV Virtual Functions straight from the physical network adapters, we bypass most virtual switching overhead for performance-sensitive workloads.
Technical Mastery
If engineering highly available, enterprise data networks is what we do in our spare time, imagine the level of precision and dedication we bring to your projects. Discover what Bright Haven Electric can offer you.
10 Outdoor Electrical Safety Tips
Electricity is essential indoors, but dealing with it outdoors comes with serious responsibilities. From downed lines after a storm to underground utilities, understanding these outdoor electrical safety tips is essential to protecting your family.
Why Outdoor Electrical Safety Tips Matter
Whether you’re getting ready to plant a tree, doing some pruning, or using a standby generator during a power outage, adhering to basic electrical safety rules can prevent dangerous situations. Before you head outside in West Central Minnesota, review these essential rules to keep your household secure.
Look Up and Around
When working outdoors around your house, always check for overhead power lines before beginning any task. Remember to keep tall ladders, roofing materials, and pruning equipment far clear of overhead lines to avoid hazardous shocks and arc flashes.
Call 811 Before You Dig
Thinking of planting a tree or building a deck? When getting ready to dig, make sure to call 811—the free “Call Before You Dig” hotline. This helps you avoid the potential hazards and expensive repairs associated with striking underground utilities.
Stay Clear of Downed Lines
After a storm, you may encounter damaged utility infrastructure. Stay far away from downed power lines. Always assume a downed line is fully energized and extremely dangerous, and report it to your local utility company immediately.
Generator Safety First
If using a backup portable generator, stringently follow the manufacturer’s instructions to prevent carbon monoxide poisoning and backfeeding. In addition, never use an oven to heat your home if your primary power is out.
Smart Tree Planting
The right tree in the wrong place can be disastrous. Always plant new trees far away from overhead power lines. If a tree has already grown into the lines, do not trim it yourself. Never climb trees near power lines, even if the lines aren’t directly touching the branches.
Avoid Lines Near Water
Water and electricity are a deadly mix. Never install hot tubs, swimming pools, or wading pools underneath or near overhead power lines. Make sure all your outdoor receptacles rely on properly functioning GFCI protection.
Respect Utility Equipment
Never climb transmission towers, power poles, or substation fences. Do not sit on the green transformer cabinets housing electrical equipment in your neighborhood. If a pet is stuck climbing a power pole, do not try to rescue it—call your utility provider or 911.
Watch Aerial Toys
Avoid flying kites, metallic balloons, drones, and radio-controlled toys near power lines. If a kite or Mylar balloon drifts into or near a power line, let it go. Never try to retrieve anything caught in a power line yourself.
Reconsider Playhouses
When building play structures for your children, placement is everything. Do not build playhouses, treehouses, or elevated viewing platforms in trees with nearby overhead lines. Keep all recreation spaces firmly out of the path of electrical feeds.
Know Your Breaker Panel
The simplest safety tip is sometimes the most important: Always know exactly where your home’s main circuit panel is located, and ensure all adults in the home know how to shut off the individual breakers and the main disconnect switch in an emergency.
Notice an Outdoor Hazard?
If your home’s exterior electrical features, such as the service drop, outdoor meter box, or exterior outlets, appear damaged from weather, wind, or age, taking rapid action is essential.
Professional Action: Never attempt to reset, bend, pull, or replace your exterior utility meter base or service mast yourself. If any of these items in or outside your home seem off, don’t hesitate to contact Bright Haven Electric LLC for a professional evaluation.
Complete Peace of Mind
We hope these outdoor electrical safety tips help you stay vigilant. Getting a thorough inspection of your home’s electrical system, both inside and out, can give you genuine peace of mind. Bright Haven Electric offers top-tier electrical safety evaluations for West Central Minnesota homeowners.
Protecting Your Family:
The Ultimate Home Electrical Safety Guide
From AFCI breakers to GFCI outlets and tamper-resistant receptacles, learn how modern electrical upgrades prevent hidden fire and shock hazards in your Minnesota home.
Related Services
Did You Know?
Standard circuit breakers only trip during a severe overload or short circuit. They cannot detect the microscopic sputtering arcs that cause 50% of residential electrical fires. Only an AFCI upgrade provides true arc-fault protection.
In today’s fast-paced world, families live life on the go. With all the running around, we often put household projects on the back burner. But one project that should never be ignored is evaluating the home electrical safety of your property.
According to the U.S. Consumer Product Safety Commission (CPSC) and the National Fire Protection Association (NFPA), incidents involving electrical equipment result in more than 41,000 residential fires each year. These electrical home structure fires claim hundreds of lives, injure thousands, and cause over $1.4 billion in property damage annually.
There is no time like the present to take a good look around your home and make the necessary changes to eliminate hidden electrical hazards that can lead to fires or electrocution. At Bright Haven Electric, we believe learning the critical differences between GFCIs, AFCIs, and proper outlet safety is the best place to start.

Understanding GFCI Protection for Home Electrical Safety
A great starting point for your home safety inspection is to take an inventory of the outlets both inside and outside your home. If you do not have Ground Fault Circuit Interrupter (GFCI) protected outlets in areas that contain exposure to water or dampness, your home is not as safe as it should be.
Remember: electricity and water don’t mix! The purpose of a GFCI is to prevent fatal shocks. A GFCI device constantly monitors current levels on the hot and neutral sides of a circuit. If the GFCI senses an imbalance of just 1/2000 of an amp—meaning electricity is leaking, potentially through you—it trips the circuit in 1/40 of a second or less.
The National Electrical Code (NEC) strictly requires GFCI protection in wet areas such as bathrooms, kitchens, basements, laundry areas, garages, and all outdoor receptacles for both new construction and major renovations.
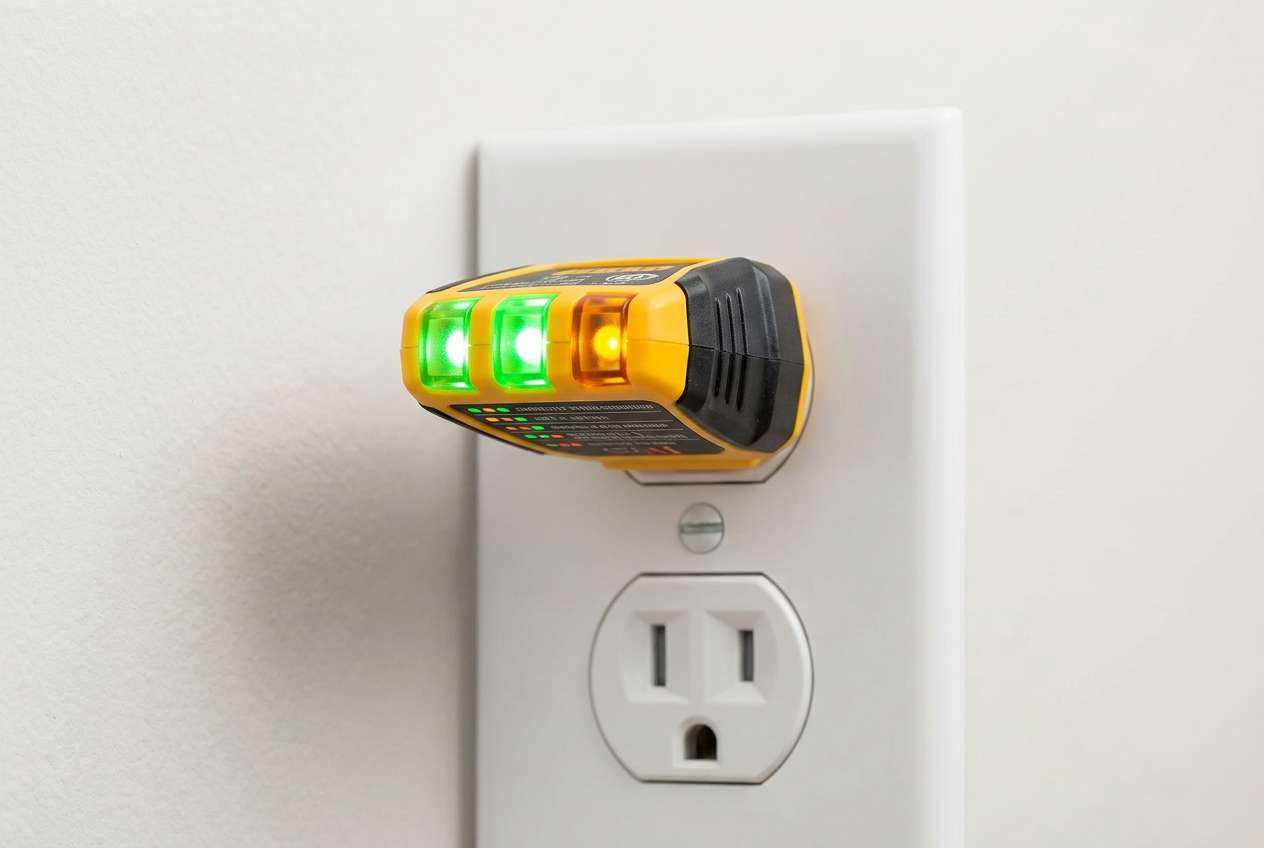
How to Test a GFCI Outlet (Takes Under a Minute!)
Don’t know if your house is equipped with working GFCIs? They’re easy to spot: they have two buttons on the face (“TEST” and “RESET”). Industry experts estimate up to 25% of all GFCIs operate improperly due to power surges or age. They should be tested monthly:
- Plug a lamp or radio into the GFCI and turn it on. The device should have power.
- Push the “TEST” button on the GFCI. It should audibly “trip” and the lamp should immediately turn off.
- Push the “RESET” button. The lamp should come back on.
If the GFCI did not trip, or if it tripped but failed to reset, the device is compromised and must be replaced immediately by a licensed electrician.
The Importance of AFCI Breakers
While GFCIs protect against shock, Arc-Fault Circuit Interrupters (AFCIs) protect against fire. The CPSC estimates that problems in home wiring, like hidden arcing and sparking, cause more than 30,000 home fires annually. Arcing faults occur when electricity jumps across a damaged wire or loose connection, generating immense heat that quickly ignites surrounding wood or insulation.
AFCIs are advanced circuit breakers installed directly in your main electrical service panel. They are designed to detect these dangerous electrical arcs instantly and shut off the power before a fire can start. The CPSC estimates that AFCIs could prevent more than 50% of these electrical fires each year.
- Typical arcing situations include hidden, damaged wire insulation (often due to rodents), loose connections at old receptacles, or heavily worn appliance cords.
- The NEC currently requires AFCI protection for newly constructed bedrooms and living areas.
- Standard circuit breakers in older homes can—and should—be easily upgraded to AFCIs by a professional.
Tamper-Resistant Receptacles (Child Safety)
Electrical safety goes beyond just preventing overloads; it involves protecting the most vulnerable members of your family. Approximately 2,400 children suffer from severe shocks or burns each year from sticking foreign objects into standard outlets—that’s nearly 7 incidents a day.
Tamper-Resistant Receptacles (TRRs) look ordinary from the outside, but inside they contain spring-loaded cover plates designed to firmly close off the receptacle slots. When a standard electrical plug is inserted, equal pressure is simultaneously applied to both sides, allowing the internal covers to slide open safely. If a child pushes a paperclip or key into just one slot, the barrier remains locked shut.
- TRRs have been mandatory in hospital pediatric care facilities for decades and are now required by the NEC in all newly built homes.
- In older Minnesota homes, standard electrical outlets can be seamlessly replaced with TRRs—an incredibly small price to pay for ensuring your toddler’s absolute safety.
- Always replace receptacles that are physically cracked, no longer hold a plug securely, feel hot to the touch, or spark when inserting a plug.
Extension Cords & Power Tool Safety
According to the Electrical Safety Foundation International (ESFi), a significant percentage of residential electrocutions involve consumer products, power tools, and temporary cords.
The Danger Zone: Electrical conductors do not always have to be physically touched to transmit current. High voltages can “jump” or arc to the nearest conductor—like a metal ladder—from up to 10 feet away.
Vital Power Tool Safety Tips:
- Never consider extension cords a permanent part of your home’s electrical system—they are strictly for temporary situations. Hidden cords under rugs can rapidly overheat and cause an arc-fault fire.
- Use GFCI protection specifically when operating power tools outside or in damp basements.
- Never overload an extension cord or a multi-plug adapter. Always verify the heavy-duty rating label matches your appliance’s draw.
- Use extreme caution when cutting or drilling into drywall where hidden electrical wires or water pipes could be accidentally penetrated.
- When using wet/dry vacuums or pressure washers, ensure your outdoor weatherproof receptacle covers are intact on your home exterior. Cold Minnesota winters can crack cheap plastic hinges; replace them with modern, heavy-duty “in-use” bubble covers.
Don’t Wait Until It’s Too Late
Dimming or flickering lights, frequently tripping breakers, and warm outlets are serious warning signs. Don’t let your home become a statistic. Periodic home electrical safety inspections are vital to discovering hidden panel corrosion, outdated wiring, or unprotected circuits.
Need peace of mind? Bright Haven Electric LLC specializes in whole-home electrical safety audits, GFCI/AFCI retrofits, and comprehensive code corrections across West Central Minnesota.
Schedule a Safety Audit
Protect your family from hidden fire hazards. Have Bright Haven Electric’s licensed experts inspect your panel, upgrade your breakers to AFCIs, and install modern Tamper-Resistant GFCIs today.
Book OnlineWhy Booking Your Electrician Online is the Smartest Move
Skip the phone tag and get fast, guaranteed service. See how our streamlined online booking tool gets our technicians to your door faster and saves you money.
When your lights flicker or an outlet breaks, playing phone tag is frustrating. Alternatively, you can book electrician online to get fast answers and safety.
At Bright Haven Electric LLC, we value your time. Therefore, we streamlined our service process. Now, you can book electrician online using our new frictionless system!
Book Electrician Online: Connect Directly with Us
Whether you want to fix a tripping breaker or install an EV charger, our Contact Us page is the fastest method. Here is why our Swift County neighbors prefer to book electrician online:
It’s Available 24/7
Electrical issues happen anytime. Consequently, you can submit a service request at 2:00 AM. Our team will review it first thing in the morning.
No Accounts Required
We hate creating accounts. Therefore, our system requires zero login. Just tell us your name, location, and the electrical problem.
Safety First Verification
We never send a technician blindly. Instead, we review your details and follow up with a quick call. As a result, we arrive with the right parts to save you time and money.
Claim Your $25 Discount!
To celebrate making things easier, we are running a special promotion. Specifically, if you book your next service call online, just enter the promotional code below in your message.
Afterward, we will automatically apply a $25 discount to your final invoice once the repair or installation is complete!
Use Code:
Stop Waiting. Start Saving.
Don’t wait for small electrical issues to become major hazards. Instead, you should book electrician online today. Apply your discount code, and let our experts handle the rest!
Understanding Your Home Electrical System
The most important step you can take to prevent electrical fires is learning about your home’s electrical system. Know the warning signs and keep your family safe.
Do you know how your home electrical system works? According to the NFPA, electrical failures cause thousands of house fires every year. These fires result in injuries and billions in property damage. Often, faulty electrical distribution or lighting equipment is to blame.
However, there is good news. Many of these fires are entirely preventable. To stay safe, you must learn to recognize the early warning signs. In this guide, we will explain your whole home electrical system. As a result, you will be better equipped to spot hazards before they cause real harm.
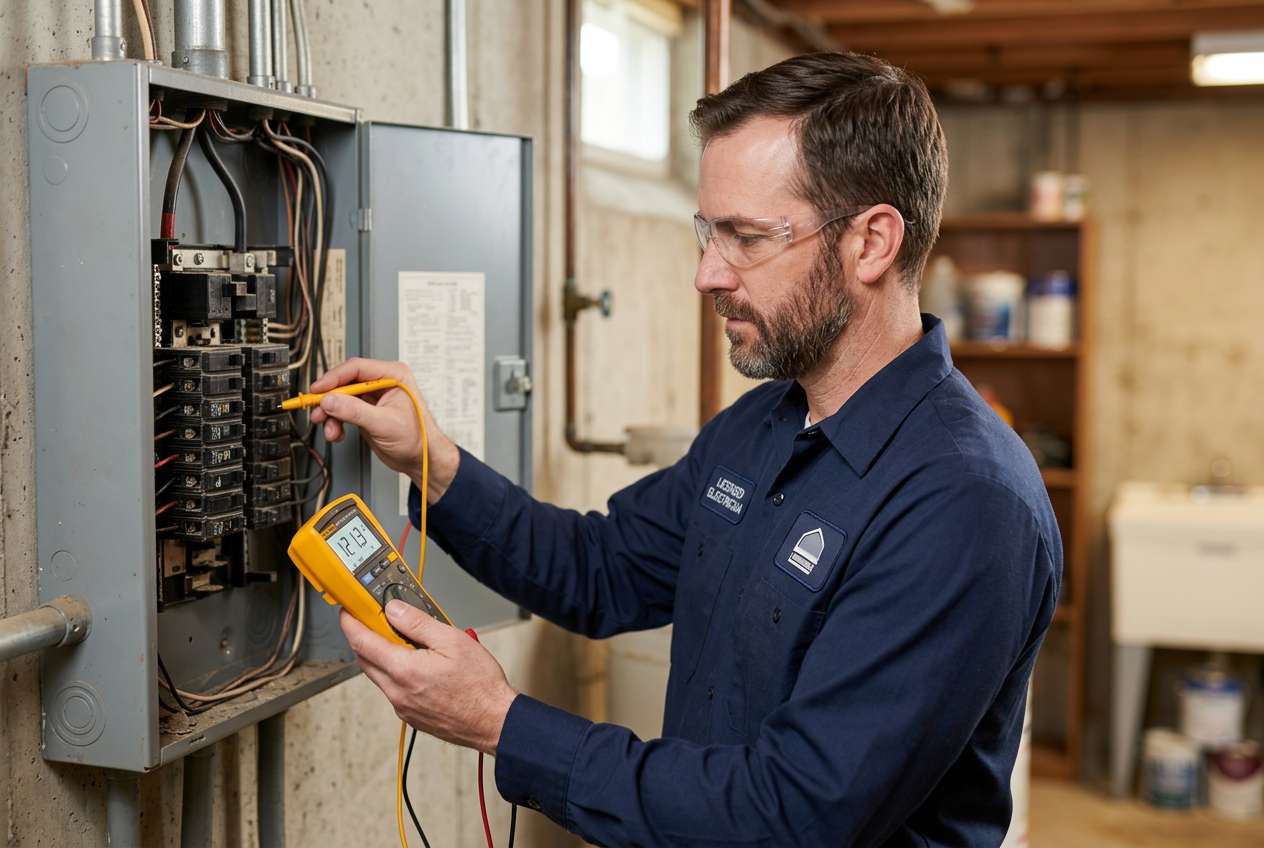
1. Your Home Electrical System’s Service Panel
Every house has a main service panel. You can usually find it in the basement, garage, or utility room. This panel sends power to your switches, outlets, and appliances. Therefore, knowing what is inside is your first line of defense.
Circuit Breakers & Fuses
These devices protect your wires from getting too hot. For example, circuit breakers “trip” to stop the power if it gets dangerously high. Older fuses will “blow” to do the same thing. If a breaker trips often, your circuit is likely overloaded. In this case, you should call a professional electrician.
Arc Fault Circuit Interrupters (AFCIs)
An arc fault is a dangerous problem. It is usually caused by stressed, damaged, or hot wires. AFCIs replace normal circuit breakers to fix this. Specifically, they detect these hidden sparks and shut the power off before a fire starts. Learn more about our AFCI upgrades.
2. Home Electrical System Wiring Types
About one-third of US homes are over 50 years old. As a result, their wiring might not be safe. The types of wires hidden behind your walls greatly impact your safety.
Knob & Tube (1800s – 1930s)
This is an old, ungrounded system. It uses ceramic knobs and tubes to run wires. Unfortunately, it chips and breaks easily as it ages. Today, it is a known fire hazard. We offer knob and tube replacement.
Aluminum Wiring (1960s – 1970s)
Builders used aluminum when copper prices were very high. However, older aluminum wiring can cause loose connections at your outlets. This creates a severe fire hazard. A licensed electrician must properly mitigate it. See our aluminum wiring solutions.
Grounded Systems (1940s – Present)
Modern wiring adds a third “ground” wire. This wire connects directly to the earth. During a short circuit, it safely sends stray power into the ground. Consequently, it greatly lowers your chance of getting shocked.

3. Outlets in Your Home Electrical System
You use your outlets every single day. Therefore, they are your most direct link to your home electrical system. Making sure they meet current safety standards is very important.
Life-Saving Outlet Technologies
Ground Fault Circuit Interrupters (GFCIs): These outlets trip off when electricity leaks. Today, building codes require them in kitchens, bathrooms, basements, and outdoors. Most importantly, GFCIs quickly stop power before a deadly shock happens.
Tamper Resistant Receptacles (TRRs): These have spring-loaded shutters. They only open when you push both sides at once. Thus, they stop children from sticking objects like keys into the outlet. As a result, they prevent terrible burn injuries.
Need an Electrical Safety Inspection?
Does something in your West Central Minnesota home seem wrong? Do you have tripping breakers or old wiring? If so, Bright Haven Electric LLC can help. We provide professional safety inspections to give you peace of mind.
Prevent Fires with AFCI Breakers
An Arc Fault Circuit Interrupter (AFCI) is one of the most important safety upgrades you can make to your electrical panel. Learn how they detect dangerous hidden faults and stop electrical fires before they start.
What Is an AFCI Breaker?
Arc Fault Circuit Interrupters (AFCIs) are specialized circuit breakers that serve as the advanced guard for your home’s electrical system. They provide an essential layer of protection against sparking or arcing faults that standard breakers cannot detect. While standard breakers shut off power if a circuit is overloaded, AFCI breakers are designed specifically to detect fire hazards.
How Does an AFCI Breaker Work?
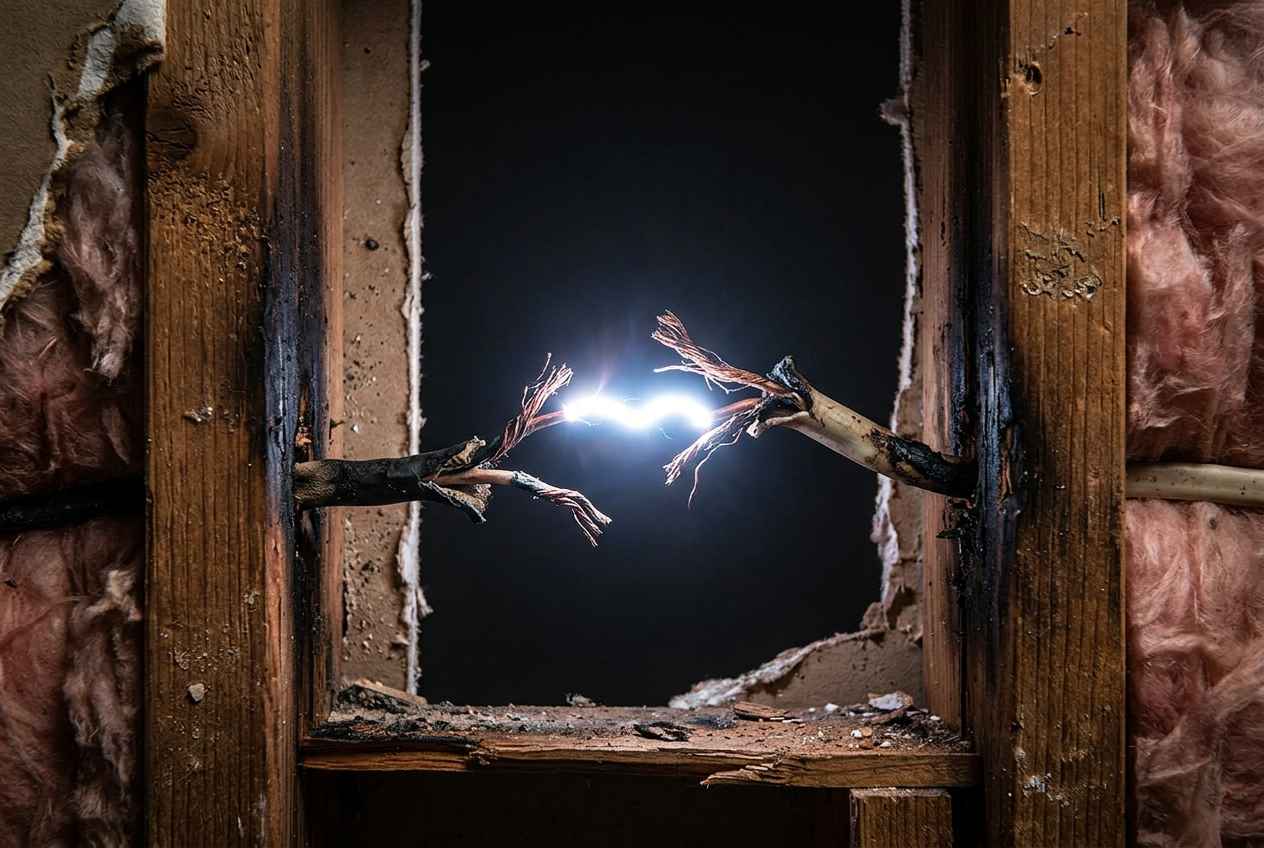
Think of an AFCI breaker as a tiny, highly sensitive computer constantly monitoring the electrical current in your home. An “arc fault” occurs when current flows along an unintended path—like jumping across a frayed wire, loose connection, or degraded insulation.
These arcs generate immense heat (exceeding 10,000°F) and are the leading cause of residential electrical fires. The AFCI instantly detects the unique electrical signature—sharp spikes and drops in voltage—of a dangerous arc and cuts the power within fractions of a second, stopping the fire hazard dead in its tracks.
AFCI vs. GFCI: What’s the Difference?
Many homeowners confuse AFCIs with GFCIs (Ground Fault Circuit Interrupters). While both protect you, their primary functions are very different:
AFCI (Fire Prevention)
Protects your home from electrical fires. Monitors the entire circuit for dangerous arcs caused by damaged wiring behind walls, loose connections, or compromised appliance cords.
GFCI (Shock Prevention)
Protects you from deadly electrocution. Required near water sources (kitchens, bathrooms, outdoors), it detects when electricity escapes its intended path and might pass through your body to the ground.
Pro Tip: You don’t have to choose between them! Dual Function AFCI/GFCI breakers are now standard, providing both fire hazard and electrocution protection in a single smart component.
Are AFCI Breakers Required?
Yes! Over the past two decades, the National Electrical Code (NEC) has aggressively expanded AFCI requirements. Today, nearly every habitable room in a new residential construction requires AFCI protection.
For older homes, there’s no law stating you must strictly upgrade your panel right this minute. However, local municipalities enforce AFCI updates when you are adding new circuits, heavily modifying existing ones, or replacing your electrical panel. Even if an upgrade isn’t legally mandated for your older home, having an electrician install AFCI breakers is the single best investment you can make for your family’s safety.
What Happens if an AFCI Breaker Trips?
AFCI breakers are incredibly sensitive—which is precisely what you want from a life-saving device! If your AFCI breaker trips, here is what you should do:
- Unplug Everything: Turn off and unplug all devices connected to that circuit.
- Reset and Isolate: Reset the breaker and plug devices back in one at a time. This helps determine if an incompatible appliance (like an old vacuum or treadmill) is causing the issue.
- Inspect Your Cords: Check device cords and plugs for damage, crimps, or frays that might be causing an arc fault.
- Consider Overload: Ensure you aren’t simply demanding too much power from that specific circuit.
If the breaker continues to trip and your efforts come up empty, do not ignore it or attempt to swap it out for a standard breaker! Call a licensed professional to find the hidden fault.
Upgrade Your Home’s Safety Today
Your family’s safety is our top priority. If you live in West Central Minnesota and want to upgrade your home with life-saving AFCI and dual-function breakers, trust Bright Haven Electric LLC for expert, code-compliant installations.
7 Home Electrical Safety Tips
From blow-drying our hair before work to celebrating our new air fryer, electricity keeps our modern lives moving along. But here’s the tricky part: Electrical fires are the second-leading cause of home fires in the U.S., especially due to aging wiring systems and a growing dependency on electronics.
Whether you’ve just moved into a new space or are looking to give your current home a much-needed self-inspection, here are the top tips to keep your West Central Minnesota home safe from common electrical dangers.
Perform Routine Checkups
Move room-to-room and inspect the things under your control. Ensure plugs fit snugly in outlets, cords are intact, and wires aren’t pinched by doors or under rugs. Major appliances (like AC units and space heaters) must plug directly into wall outlets, never a power strip or extension cord!
Know the Warning Signs
Hidden issues like failing knob-and-tube wiring can degrade unseen. Keep an eye out for flickering lights, tripped breakers, buzzing sounds from walls or appliances, odd smells, sparks, or wall switches that feel unusually hot to the touch.
Avoid Electrical Overloads
We know how tempting it is to fit just one more plug into that surge protector. But most outlets can only handle 15 to 20 amps. Overloaded systems are top culprits of electrical fires. Never daisy-chain extension cords. If you rely on them, you need an electrician to add more circuits.
Reconsider DIY Wiring
The moment wiring behind the walls comes into the picture, drop the tools. Anything past changing a light fixture requires the help of a licensed professional to avoid shock hazards, code violations, or starting a slow-burning fire inside your wall cavities.
Unplug Unused Appliances
If you do not need an appliance at all times—such as a slow cooker, hair straightener, or blender—unplug it when not in use to eliminate standby phantom power draw and reduce the risk of a short circuit. Going on vacation? Unplug computers and TVs to dodge storm surge damage.
Childproof Your Outlets
If you have little ones in the house, plastic plug-in covers only go so far. Upgrade to Tamper Resistant Receptacles (TRRs). TRRs have a built-in spring-loaded internal shutter that prevents a child from inserting a singular unwanted object into the wall.
#7: Upgrade to AFCI Protection
Arc faults cause a whopping 30,000 home fires throughout the U.S. each year. An arc fault is an unintended electrical discharge—a spark or continuous arc jumping across a gap—usually caused by damaged wires or old cord insulation.
Arc Fault Circuit Interrupters (AFCI): AFCIs are advanced breakers that constantly monitor the electrical waveform. They can detect the moment this damaging fault occurs, cutting off power before the arc can start a fire. Having an electrician install AFCI breakers in your panel is a massive leap forward for your home’s safety profile.
Complete Peace of Mind
Electrical safety goes far beyond avoiding a tripped breaker. By paying close attention to the wiring of your home, you can earn peace of mind. If you suspect your home has an electrical hazard, let Bright Haven Electric LLC perform a thorough safety inspection.
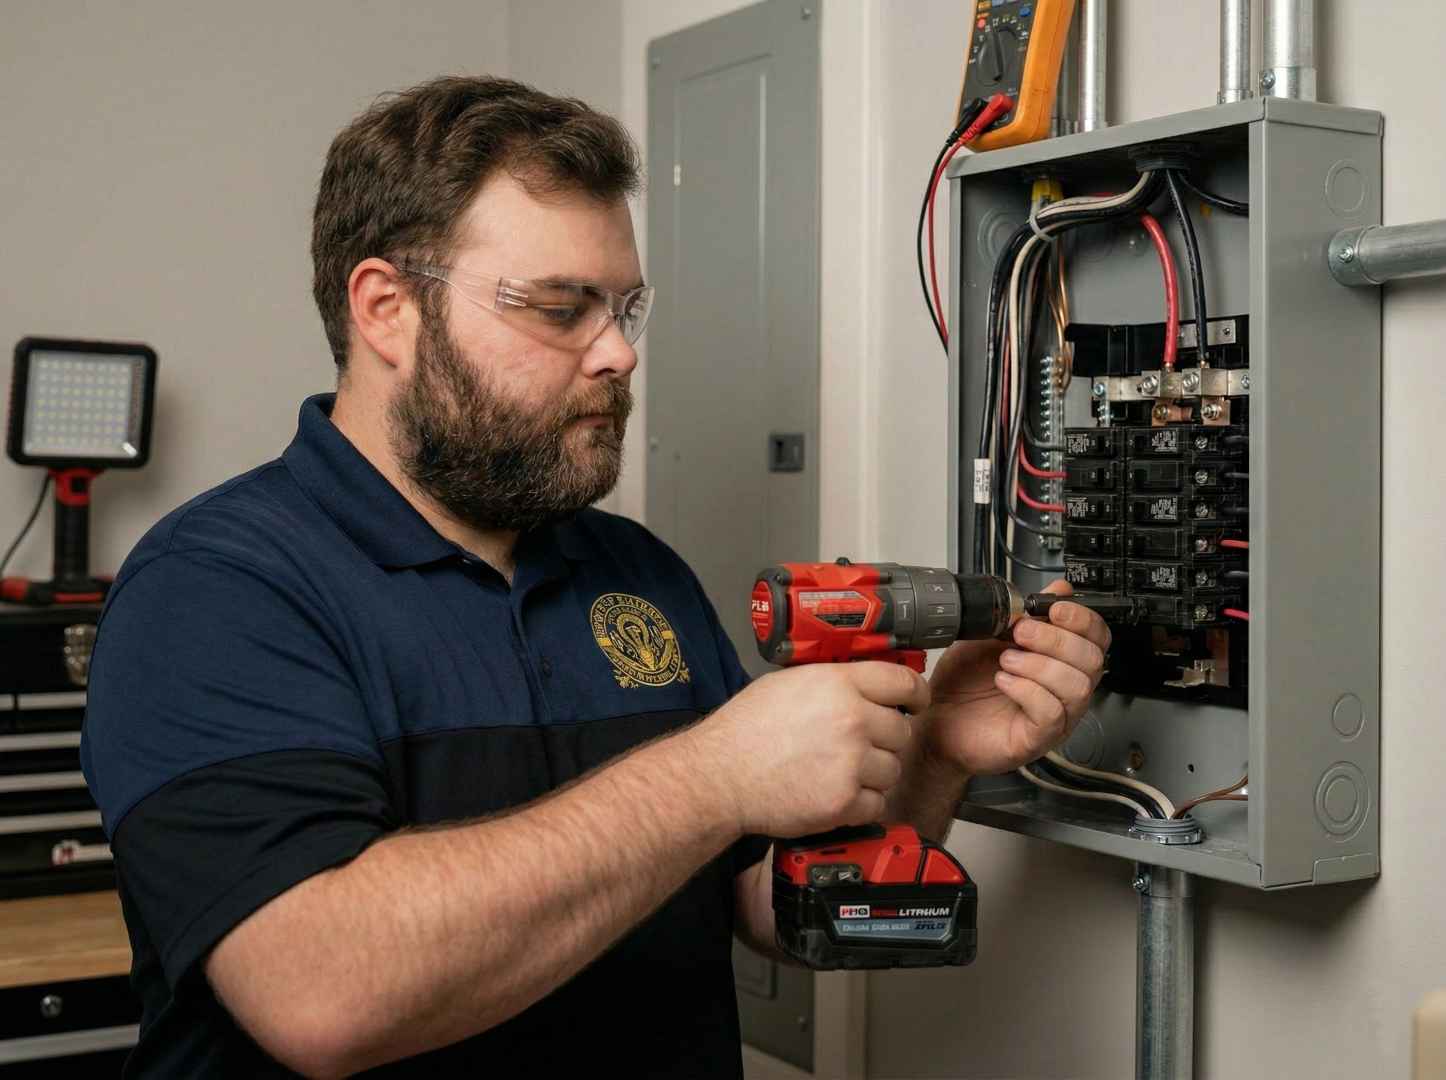
Is Your Electrical Panel Unsafe?
If you own an older West Central Minnesota home built before 1990, you might have one of these outdated main electric panels hiding in your basement or garage. They don’t just look old—they can be extremely dangerous fire hazards.
4 Dangerous Panels You Should Replace
Electrical panels contain safety devices (either fuses or circuit breakers) designed to trip and shut off power when too much electricity flows through them, preventing house fires. However, many older homes still rely on outdated panels that fail to operate as intended.
Here are four types of unsafe electrical panels you should consider replacing immediately if found in your home:
Federal Pacific Electric (FPE)
Popular from the 1950s to 1980s, these panels are notorious for breakers that fail to trip during short circuits or overloads. Even worse, FPE circuits in the “off” position may still send power, putting anyone working on them at risk of severe electrocution. Look for “Federal Pacific” or “Stab-Loc” printed inside.
Zinsco (GTE-Sylvania)
Commonly installed in the 1970s, Zinsco panels have a critical flaw: their circuit breakers can melt and permanently fuse to the main bus bar. Once melted, the breaker can never trip, allowing massive power surges to melt wires and start fires. If you see the names “Zinsco”, “GTE-Sylvania”, or “Sylvania”, get an inspection immediately.
Split-Bus Electrical Panels
Modern panels have a single main disconnect. Split-bus panels, last used over 40 years ago, have up to six “main” breakers controlling different buses. While not inherently flawed by design, they are far past their expected lifespan, meaning breakers may stick. Furthermore, current electrical codes no longer permit multiple disconnects in this manner.
Modified Fuse Boxes
Fuses safely stop overloads by burning out, but modern domestic energy consumption easily overwhelms old fuse boxes. The real danger comes from homeowners who try to stop fuses from blowing—like plugging in too many appliances, installing oversized fuses (e.g., 20-amp instead of 15-amp), or placing a metal coin behind the fuse, completely removing any fire protection.
Don’t Take Chances With Your Safety
Is an outdated panel secretly threatening your family’s safety?
Get a Professional Inspection: If you spot an FPE, Zinsco, split-bus, or old fuse box in your home, do not attempt to service it yourself. At the very least, you should have a licensed, professional electrician inspect the panel for signs of scorching, melting, or failure. A panel replacement is a small price compared to losing your home to an electrical fire.
Upgrade Your Home’s Electrical Panel
If you live in West Central Minnesota and suspect your home has an unsafe, outdated electrical panel, Bright Haven Electric LLC is here to help keep your family secure and your home up to code.
Perfecting Your TV Wall Mount
Ready to upgrade your living room? TV wall mounting frees up space, looks sleek, and improves viewing angles. But before you start drilling holes in your drywall, review these 6 essential tips from professional electricians.
6 Crucial Considerations for Installation
Hanging a flat-screen isn’t as simple as driving a few screws with a drill. You need to account for sight lines, building materials, and electrical code compliance. Here is what you need to research before purchasing your TV bracket:
Choose Your Mount Bracket
A fixed or tilting mount will hold your TV close against the wall holding it securely in place while tilting down slightly—ideal for above a fireplace. An articulating mount features a retractable arm allowing you to pull the TV out and swivel it toward various seating areas.
Plan for Connected Devices
What needs to be connected? A cable box, Apple TV, soundbar, or gaming consoles like an Xbox or PlayStation? Knowing this dictates how many HDMI cables your installer needs to run through the wall during the project.
Determine Component Storage
Where will those devices live? If you want a clean aesthetic, you can house them in a media console below the screen, place them on floating shelves, or use hidden wireless boxes mounted behind the TV itself.
Determine Viewing Height
Comfort is key. You don’t sit in the front row of the movie theater staring straight up, so don’t subject yourself to neck strain at home. Finding the optimal height relative to your seating arrangement is crucial before mounting.
Acknowledge Your Wall Type
What is your wall made of? Drywall on wood studs, metal studs, lath and plaster, solid brick, or stone? Your wall type dictates the necessary anchors and drill bits, and determines how easily wires can be hidden.
Don’t Violate Fire Codes!
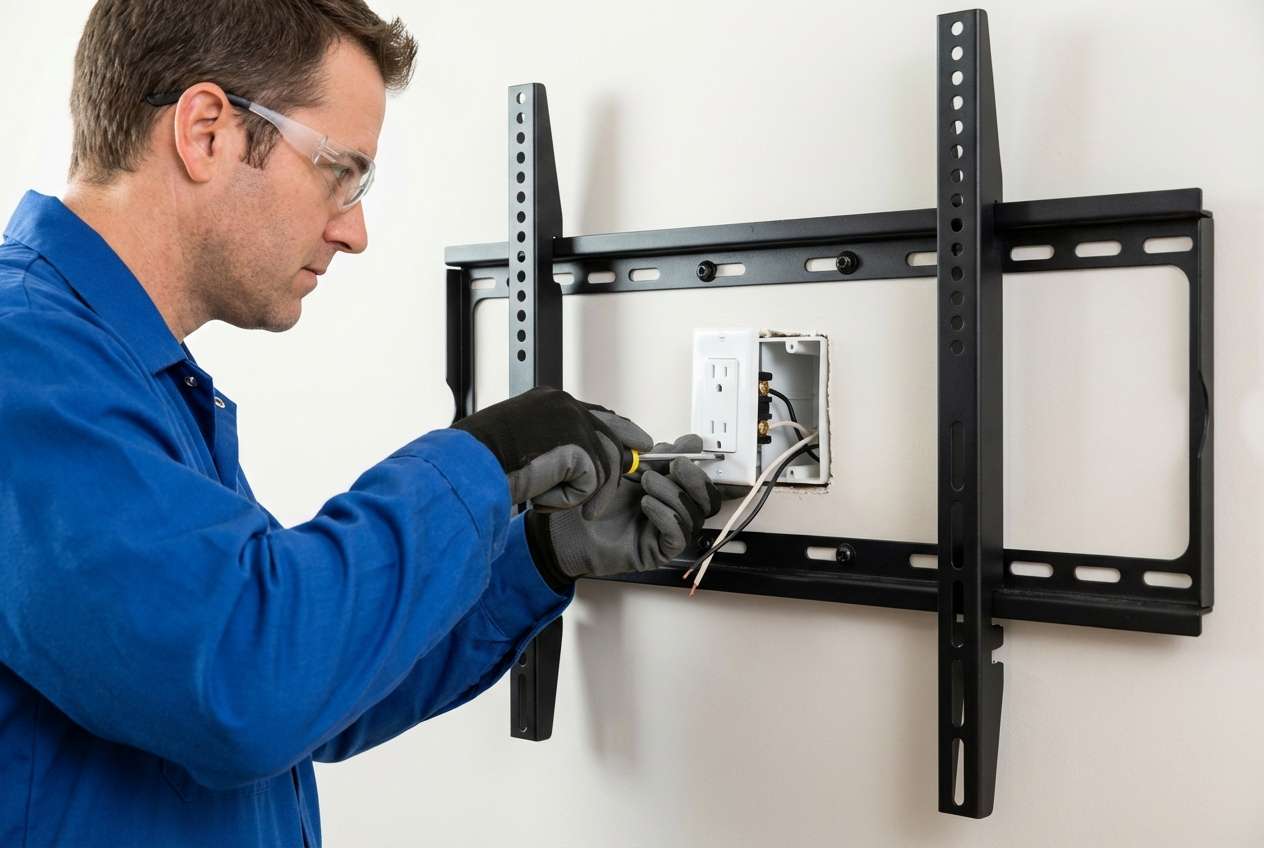
Fire code dictates that high-voltage power cords (like the plug that comes with your TV) CANNOT be run inside or behind walls. Doing so is a major fire hazard. Low-voltage data wires (like rated HDMI) can be hidden, but for power, you need to install a new recessed electrical outlet behind the screen.
The Hidden Danger of DIY Installations
Many DIYers make the mistake of dropping the factory TV power cord behind the drywall to hide it. This is a severe National Electrical Code (NEC) violation and a significant fire hazard due to the jacket not being rated for in-wall heat dissipation. If a fire starts in the wall cavity, your insurance company can deny the claim.
Instead, the safe and legal method is to hire a licensed electrician to run NM-B (Romex) cable within the wall and install a permitted, recessed code-compliant electrical outlet directly behind the mounting bracket.
What to Expect From a Professional Install
When you hire Bright Haven Electric LLC, we handle the heavy lifting, the mounting, the wiring, and the code compliance.
- The Right Cables: We recommend CL3-rated HDMI cables, which are approved for in-wall use without requiring a conduit. When calculating length, add your vertical drop, horizontal run, plus an extra 6 feet for slack.
- Electrical Assessment: If adding an outlet behind the TV, we will evaluate your breaker panel first to ensure you have sufficient capacity and the correct breakers.
- Clean Installation: Running cables horizontally across multiple studs requires cutting into sheetrock. As professionals, we minimize damage and can recommend trusted drywall contractors for seamless patching.
- Permitted Work: A typical clean installation of a mount, hidden wiring, and an additional outlet takes under 4 hours, and we handle the necessary electrical permits to protect your home’s value.
Ditch the Extension Cords
Get a clean, professional, and code-compliant TV installation. Let Bright Haven Electric hide those wires safely and securely so you can enjoy the view.
Security Lighting Protects Your Home
When it comes to keeping your family safe, there’s something powerful about professionally installed security lighting. From deterring break-ins to preventing accidents, here are five ways a well-lit home protects you.
Top 5 Benefits of Outdoor Lighting
Whether you are considering ambient landscape illumination or bright motion-sensing floodlights, investing in outdoor lighting pays off. Our lighting experts at Bright Haven Electric LLC find that proper illumination consistently offers the following five benefits:
Peace of Mind
There’s no substitute for feeling safe. Peace of mind is completely achievable when you have reliable lighting installed outdoors. No more hesitation when stepping out at night—just sit back, relax, and let your home take care of you.
Keep Unwanted Animals Away
Darkness invites pests. Unwanted animals can linger on your property, dig through trash, and even pose diseases like rabies. Bright lighting helps keep rabid raccoons, opossums, and predators far away from your property and outdoor pets.
Lower Insurance Premiums
Want a break on your homeowner’s insurance? Installing professional outdoor security lighting is a recognized safety improvement that can often make your premiums go down tremendously. Check with your agent about home security discounts!
Decrease Home-Based Injuries
A surprising number of slip and fall accidents happen right in our own driveways due to a lack of lighting. Especially during icy Minnesota winters, illuminated walkways, stairs, and porches will prevent painful accidents.
Stop Burglars in Their Tracks
Proper lighting cuts the chances of your home being broken into. Most burglars look for hidden, shadowy paths on the sides and rear of homes. Motion sensors and timed lights remove their cover and force them to look elsewhere.

Placement is Everything
Buying high-quality fixtures is only half the battle. If a light is pointed incorrectly, it can blind you instead of helping, or leave dark spots right where intruders hide.
Professional Installation Matters: A security lighting strategy should be designed and installed by a professional lighting expert or licensed electrician. We ensure that your lights withstand the harsh weather year-round while perfectly illuminating the target zone.
Upgrade Your Home’s Security
You’ll be the first one on the block with a beautifully lit, expertly secured exterior. Stop guessing with DIY kits and let Bright Haven Electric provide reliable outdoor illumination.