
Electrical Wiring for Home Remodels: What Every Homeowner Should Know
 Chadwick Ferguson
Apr 2, 2026
Chadwick Ferguson
Apr 2, 2026
Planning a Remodel? Here’s What Your Electrician Needs You to Know
Whether you are updating a single bathroom or gutting an entire kitchen, every remodel has an electrical side. From one outlet to a whole-home rewire — we handle it all, and permits are always included.
Read more in: Residential Service Upgrades, Safety & Code Compliance
Electrical wiring for home remodels is one of the most common — and most misunderstood — parts of any renovation project. Whether you are planning a full kitchen gut-job or simply adding an outlet behind a wall-mounted TV, there is almost always an electrical component that needs a licensed professional. Most homeowners do not realize how much has changed in the electrical code over the past decade. As a result, even a straightforward bathroom refresh can trigger new requirements for GFCI and AFCI protection, dedicated circuits, and tamper-resistant receptacles.
At Bright Haven Electric, we work on remodels of every size — as a subcontractor on your GC’s project or as the primary contractor when the scope is mostly electrical. Furthermore, we are equally comfortable with a one-day finish window as we are with a multi-visit rough-in, trim, and final schedule. Every project includes permits and no-stress state inspections at no extra cost.
Why Every Remodel Needs an Electrician
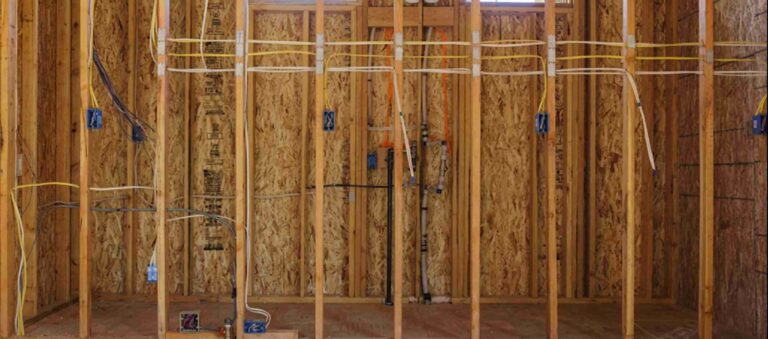
Many homeowners assume the electrical portion of a remodel is simple — just move a few outlets and call it done. However, modern code requirements have changed dramatically. The current NEC now requires arc-fault protection on nearly every living-space circuit, ground-fault protection in kitchens, bathrooms, laundry rooms, and garages, plus tamper-resistant receptacles everywhere. Consequently, even a “minor” remodel often involves panel work and new circuits. Working with existing wiring introduces its own challenges, too — especially in older homes with knob-and-tube wiring, aluminum branch circuits, or undersized panels.
What Triggers an Electrical Permit
In Minnesota, the following work always requires an electrical permit and a state inspection: adding or relocating any outlet, switch, or light fixture; installing or modifying a circuit; replacing a panel or adding a sub-panel; and wiring any new appliance. Therefore, if your remodel touches any wiring at all, you need a permit. At Bright Haven Electric, that permit is always included in the price — along with the inspection.
Common Remodel Scenarios We Handle
Our process is as flexible as your project demands. Below are the most common residential remodel scenarios we handle, from single-visit projects to multi-phase builds. We coordinate with your general contractor or work directly with you — whichever fits your project best.
Kitchen & Bathroom Remodels
Kitchen Remodel Wiring
Typical Scope: 6–10 new or modified circuits, GFCI countertop receptacles every 4 feet, dedicated 20A circuits for dishwasher, disposal, microwave, and refrigerator, under-cabinet LED lighting, and pendant or recessed ceiling fixtures.
NEC Requirements: Two dedicated 20A small-appliance branch circuits (NEC 210.52(B)), GFCI protection for all countertop receptacles within 6 feet of the sink (NEC 210.8(A)(6)), and AFCI protection on all 15A and 20A kitchen circuits (NEC 210.12(A)).
Our Process: We visit during the rough-in phase (walls open) to run all new wire, set boxes, and install any recessed lighting cans. After drywall and paint, we return for the trim visit — installing outlets, switches, fixtures, and covers. A final visit connects appliances and verifies every circuit. Throughout the process, we coordinate directly with your GC or handle scheduling ourselves.
⚡ Pro Tip: If your panel is full, a kitchen remodel is the ideal time to upgrade to a 200-amp service. We roll the panel upgrade into the same project and permit.
Bathroom Remodel Wiring
Typical Scope: Dedicated 20A bathroom circuit, GFCI-protected outlets, exhaust fan with humidity sensor or timer, vanity lighting, heated floor thermostat and circuit, and towel warmer outlet.
NEC Requirements: At least one dedicated 20A circuit for the bathroom receptacle(s) (NEC 210.11(C)(3)), GFCI protection for all bathroom outlets (NEC 210.8(A)(1)), and AFCI protection on the bathroom circuit (NEC 210.12(A)).
Our Process: Many bathroom projects are completed in one or two visits. If the walls are already open for tile work, we can rough-in and trim on the same visit. For larger bathrooms with heated floors or new ventilation, we coordinate a rough-in and trim schedule with your tile installer and plumber.
✅ Included: Electrical permit, state inspection, and removal of any outdated two-prong outlets or non-GFCI receptacles in the space.
Basements, Additions & Whole-Home Rewires
Basement Finish Wiring
Typical Scope: Multiple new circuits for bedrooms, living areas, home office, and home theater. Recessed lighting throughout, smoke and CO detectors, egress window outlets, and a dedicated home office circuit for computer equipment.
NEC Requirements: AFCI protection on all 15A and 20A bedroom and living-area circuits. Smoke alarms in every bedroom and outside each sleeping area, interconnected with a CO detector. Tamper-resistant receptacles on all outlets.
Our Process: Basement finishes follow the same rough-in and trim schedule as any new construction. We set all boxes, run wire, install recessed cans, and rough-in before insulation and drywall. After paint, we return for trim. Because basements often need 8–15 new circuits, we confirm panel capacity at the start and recommend a sub-panel if needed.
⚡ Pro Tip: If you plan to add a hot tub or sauna to your basement project later, tell us now. We can pre-run the wire and set the disconnect during the rough-in phase — saving you the cost of opening walls later.
Room Additions & ADUs
Typical Scope: Sub-panel fed from the main panel, full circuit layout for the new space, exterior outlets, porch lighting, smoke and CO detectors, dedicated HVAC circuit, and structured cabling for data and entertainment.
NEC Requirements: A load calculation (NEC Article 220) determines whether the existing service can handle the addition. If not, you need a 200A service upgrade before connecting the new space. Every room must meet all current code — including AFCI, GFCI, tamper-resistant receptacles, and interconnected smoke alarms.
Our Process: We typically start with a site survey and load calculation to determine whether a panel upgrade is needed. From there, we follow the standard rough-in, insulation, drywall, and trim sequence — coordinating with your builder on every phase. For ADUs and bunkhouses, we can also install a separate sub-panel and disconnect so the space has its own electrical identity.
Small Projects & Whole-Home Rewires
Small Projects & Single-Visit Work
Typical Scope: Adding an outlet behind a wall-mounted TV, installing a ceiling fan with a proper fan-rated box, swapping a light fixture, adding a dimmer switch, running a dedicated circuit for a window AC or space heater, or installing an outdoor outlet for landscape lighting and holiday lights.
Our Process: These projects are typically completed in a single visit — usually half a day or less. We show up, do the work, pull the permit, and schedule the inspection. No project is too small. Whether it is one outlet or ten, the quality of workmanship and the permitting process are exactly the same.
✅ Same quality. Same permit. Same inspection. The size of the project never changes what is included.
Whole-Home Rewire
When It’s Needed: Homes with knob-and-tube wiring, aluminum branch wiring, fuse boxes, or panels that have been recalled or are at capacity. Insurance companies increasingly require remediation before they will renew a policy — and a full rewire is often the most cost-effective long-term solution.
Typical Scope: New 200-amp service, new main panel, all-new NM-B copper branch circuits, AFCI and GFCI protection on every required circuit, grounded three-prong outlets throughout, new smoke and CO detectors, and a clean, labeled panel schedule.
Our Process: A whole-home rewire is a multi-day project, but we plan it carefully to minimize disruption. We work room by room, maintaining power to the rest of the house. In most cases, you can stay in the home during the project. We coordinate all inspections, including the rough-in inspection before drywall patches and the final inspection after everything is trimmed out.
⚡ Pro Tip: If your home insurance company has flagged your wiring, contact us immediately. We have experience with insurance compliance letters and can provide the documentation your insurer requires.
How We Work: Subcontractor or Primary
One of the most common questions we get is: “Will you work with my general contractor, or do I hire you directly?” The answer is both — and we have a streamlined process for each.
Working as a Subcontractor
When we work as a sub on a GC-managed project, we coordinate directly with your builder on every phase. That means showing up at the times your GC schedules, following their punch list, and communicating through their project management process. However, we still pull our own electrical permit and manage the inspection directly — because that is how Minnesota requires it. In other words, you get the convenience of a single point of contact through your GC while still receiving a fully permitted electrical installation.
Working as the Primary Contractor
When the scope is primarily electrical — a panel upgrade, a whole-home rewire, or adding circuits throughout the house — many homeowners hire us directly. We manage the project from start to finish: site survey, load calculation, material procurement, scheduling, permitting, and inspections. If you need patching or paint after we open walls, we coordinate that with our trusted partners or leave it for your handyman. Either way, the electrical scope stays under our control and our warranty.
Why Permits & Inspections Are Always Included
No-Stress Inspections — Every Time
- Permits protect your resale value. Home inspectors flag unpermitted electrical work every time, and it can delay or kill a real estate transaction. Therefore, we pull a permit on every project — no exceptions.
- Inspections verify safety. A state-licensed inspector reviews every installation to confirm it meets the current NEC and Minnesota amendments. You know the work is done right.
- Insurance requires it. If unpermitted electrical work causes a fire, your homeowner’s insurance can deny the claim entirely. Consequently, a $50 permit is the cheapest insurance you can buy.
- We handle everything. We pull the permit, schedule the inspection around your timeline, meet the inspector on site, and deliver the final approval documentation to you. In other words, you never have to think about it.
- The cost is included in every quote. Permits and inspections are never a surprise line item. They are always baked into the price from day one.
Understanding the Multi-Visit Process
For larger remodels, the electrical work typically happens in phases that align with the rest of the construction schedule. Understanding these phases helps you plan and prevents delays.
Rough-In Phase
- When: After framing, before insulation and drywall.
- What we do: Run all new wire (NM-B copper), set outlet and switch boxes, install recessed lighting cans, mount fan-rated boxes for ceiling fans, and pre-wire any smart home or structured cabling.
- Inspection: A rough-in inspection happens at this stage so the inspector can see the wire runs before they are covered. As a result, any corrections are made now — not after drywall.
Trim Phase
- When: After drywall, texture, and paint.
- What we do: Install all outlets, switches, dimmers, cover plates, light fixtures, ceiling fans, under-cabinet lighting, and any smart home devices. We also connect hardwired appliances such as dishwashers and disposals.
- Why it matters: Everything you see and touch — every switch, every cover plate, every fixture — goes in during trim. This is the phase that determines the finished quality of your project. Consequently, we take our time to make sure everything is level, plumb, and clean.
Final Inspection & Closeout
- When: After all electrical work is complete.
- What happens: The state inspector returns to verify the finished installation. They test GFCI and AFCI devices, confirm proper grounding, check polarity on every outlet, and verify the panel schedule.
- What you get: A final inspection sticker and documentation proving every circuit in your remodel is code-compliant. In addition, this documentation is your proof of quality work if you ever sell, refinance, or file a claim.
Typical Cost Ranges
Every remodel is different, so these ranges reflect typical project costs in the West Central Minnesota market. Your actual cost depends on the scope of work, the condition of your existing wiring, and whether a panel upgrade is needed. We provide a detailed, written quote before any work begins.
Single Outlet / Switch
$150 – $400
Same-day, single visit
Bathroom Remodel
$800 – $2,500
1–2 visits typical
Kitchen Remodel
$2,500 – $6,000
2–3 visits, rough + trim + final
Basement Finish
$3,000 – $8,000
Multi-visit, scope-dependent
Addition / ADU
$4,000 – $12,000+
Includes sub-panel if needed
Whole-Home Rewire
$8,000 – $20,000+
Multi-day, includes 200A upgrade
What Drives the Cost Up
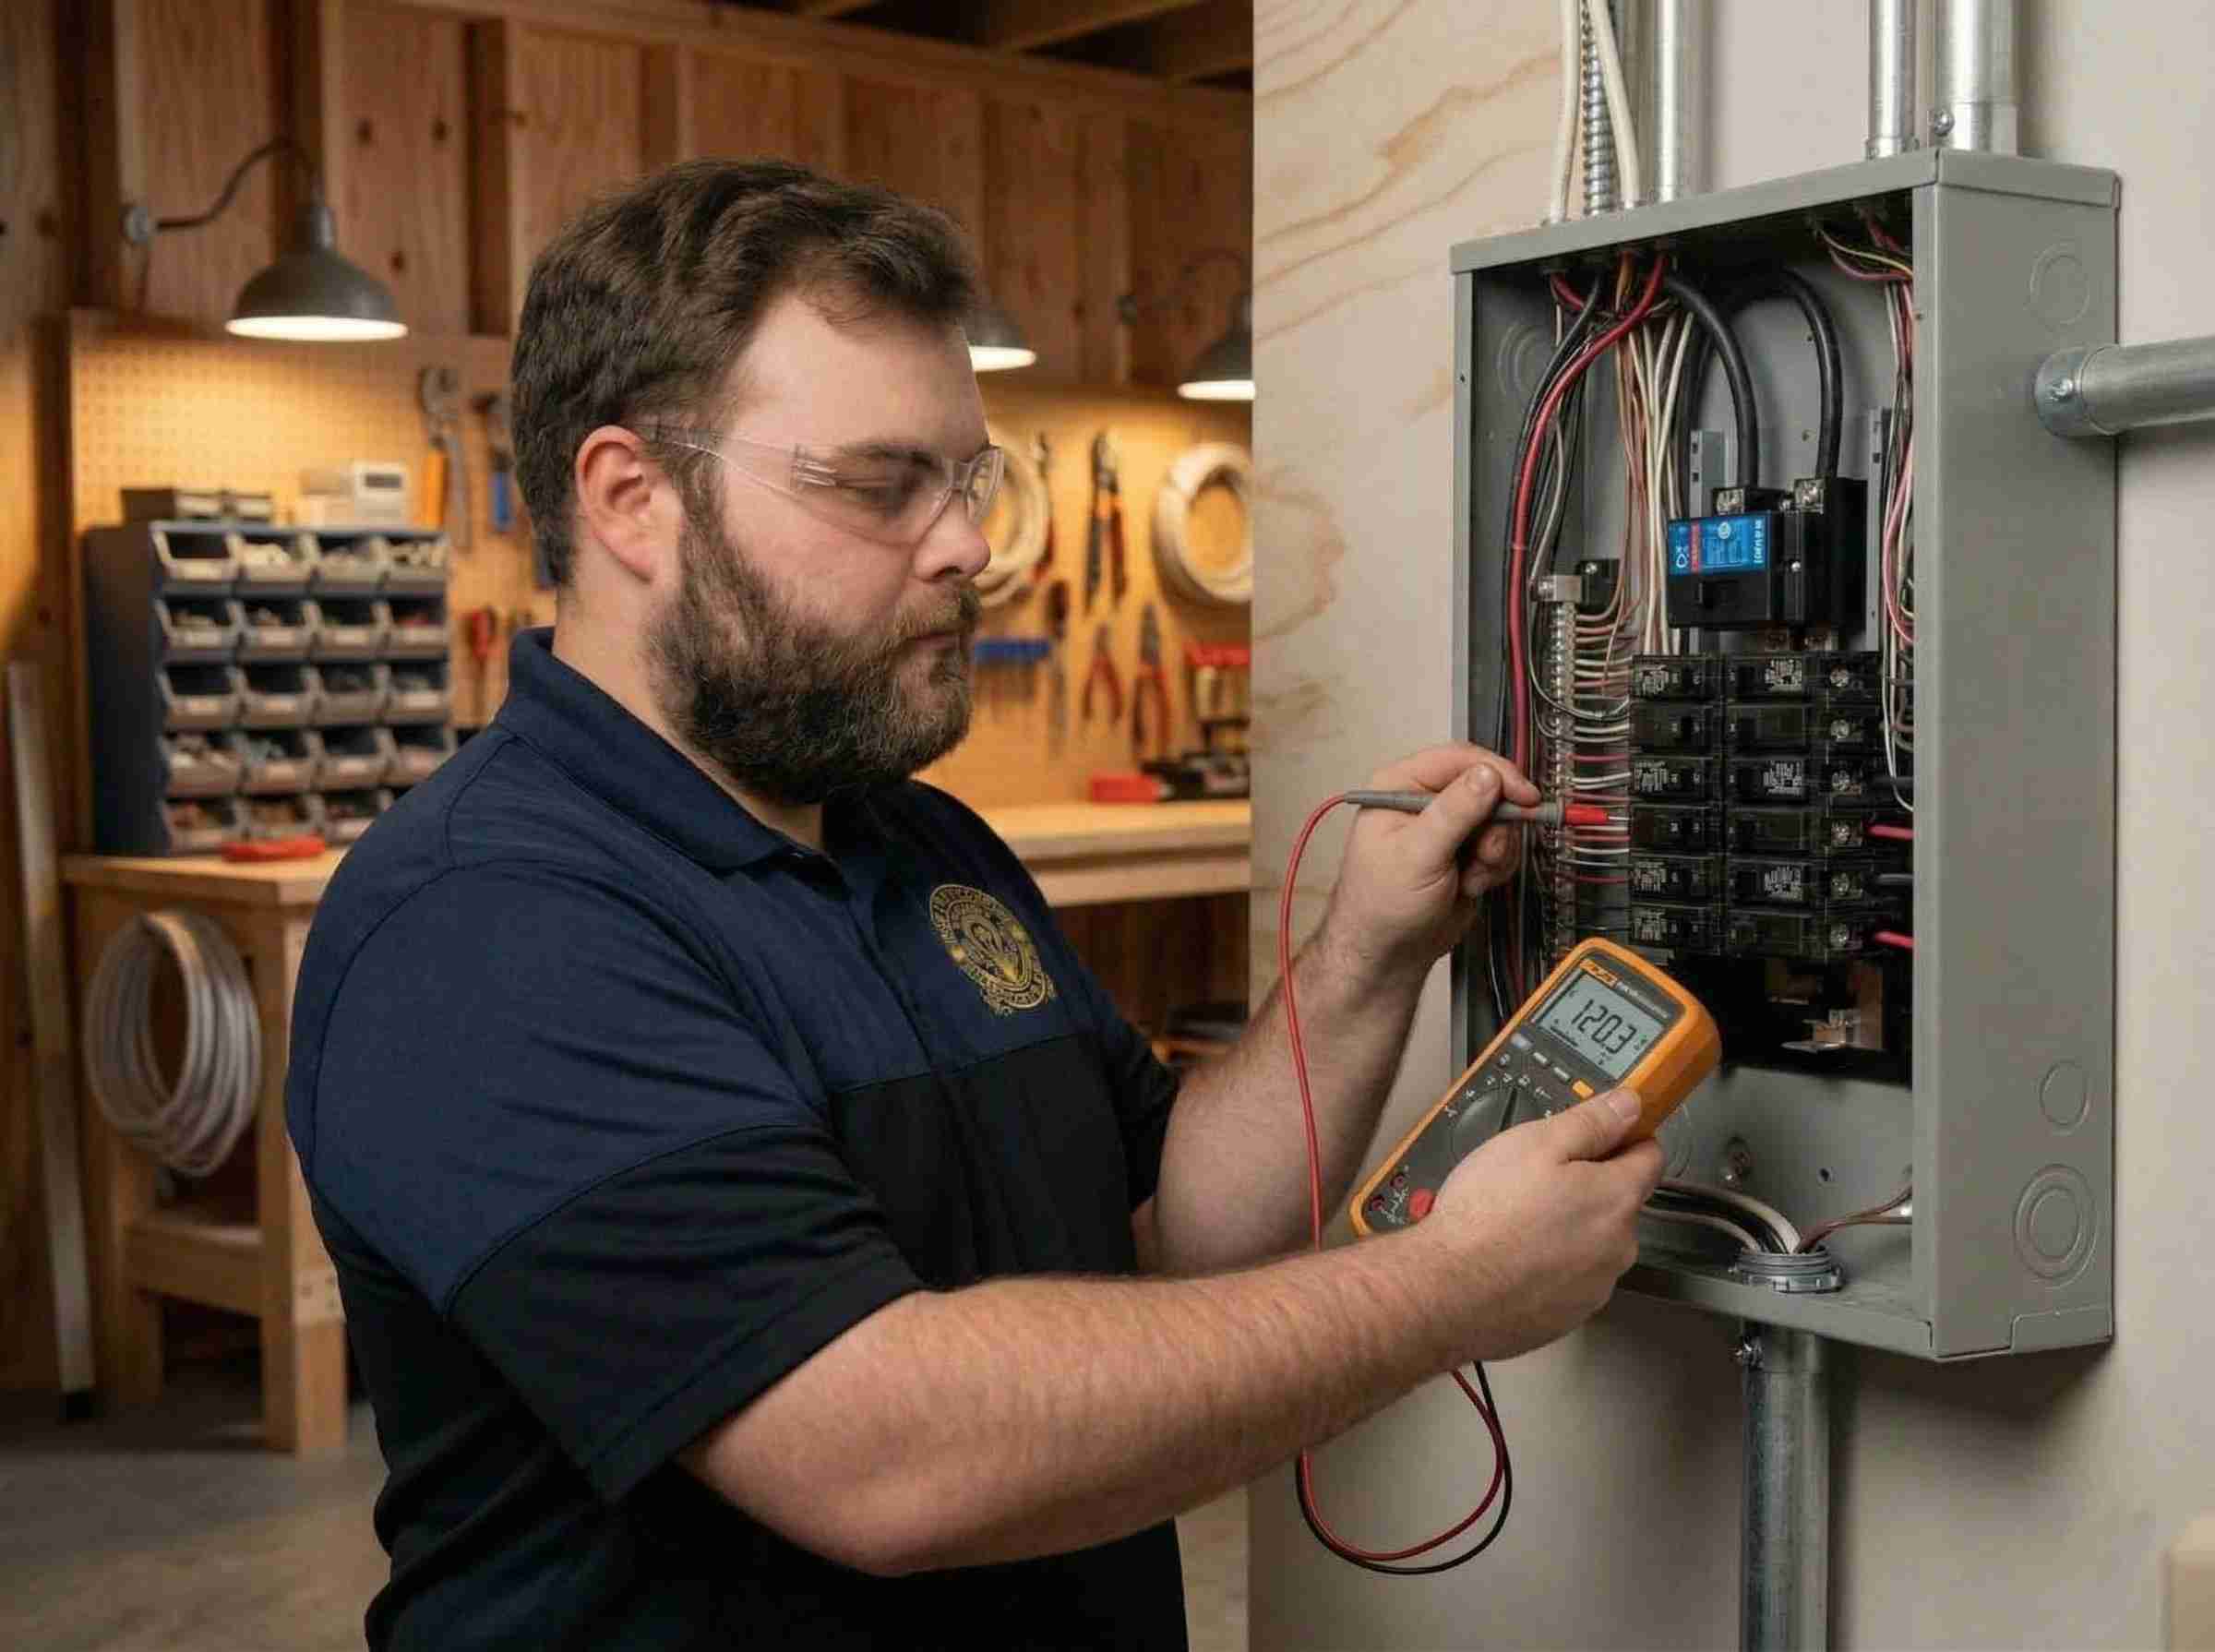
- Panel upgrades: If your existing panel is full, undersized (100A), or contains recalled breakers, a panel upgrade adds $2,000–$4,000 to the project. However, this is often unavoidable and always worth doing.
- Access difficulty: Finished ceilings, insulated walls, and slab-on-grade construction make wire runs harder and more time-consuming. Consequently, open walls during a remodel are the cheapest time to add circuits.
- Code catch-up: Older homes often need additional work to bring existing circuits up to current code when new work is added in the same area. As a result, it is better to address these issues during the remodel rather than defer them.
How to Plan the Electrical Side of Your Remodel
Time needed: 15 minutes
Before your contractor tears out the first cabinet, you should understand what the electrical side of a remodel involves. This walkthrough covers the key steps — from kitchen and bath wiring to panel capacity — so you can plan ahead and avoid costly surprises.
- List every electrical change in the project
First, walk through the space and write down every outlet, switch, light fixture, and appliance that will move, change, or be added. A kitchen remodel, for example, typically adds dedicated 20A circuits for the dishwasher, disposal, microwave, and refrigerator — plus GFCI-protected countertop outlets every four feet along the backsplash.
- Check your electrical panel for available space
Next, open your panel door and count the available breaker slots. A kitchen remodel alone can require four to eight new circuits. If your panel is full — or if you still have a 100A service — your electrician may recommend a panel upgrade or sub-panel as part of the project. This is also the time to identify any outdated or recalled breakers.
- Decide on lighting and control preferences
Then, think about how you want the finished space to feel. Do you want recessed LED cans on a dimmer? Under-cabinet task lighting? A ceiling fan with a wall switch? Smart switches or three-way controls? These decisions affect how many switch legs and circuits your electrician runs during the rough-in phase — so it is easier and cheaper to decide before the walls are open.
- Confirm your project timeline with your electrician
Furthermore, coordinate your schedule with your electrician early. Electrical work on a remodel happens in phases: a rough-in visit before drywall, then a trim visit after paint. Some smaller projects — like a bathroom fan swap or an outlet addition — wrap up in a single visit.
- Understand the permit and inspection process
Finally, know that in Minnesota, any new circuit, panel modification, or fixture relocation requires an electrical permit. Your electrician pulls the permit, schedules the state inspection, and handles the paperwork. At Bright Haven Electric, permits and inspections are always included in the quote — no hidden fees and no surprises.
Common Questions About Remodel Electrical Wiring
In most cases, yes. If you are adding or relocating any outlets, switches, lighting, or exhaust fans, that work requires an electrical permit in Minnesota. Even a straightforward bathroom refresh often involves upgrading to a GFCI-protected outlet, adding a dedicated 20-amp bathroom circuit (required by NEC 210.11(C)(3)), or wiring a new ventilation fan. We handle bathroom electrical work all the time — it is one of the most common single-visit projects we do.
The NEC requires a minimum of two dedicated 20-amp small appliance branch circuits for the countertop receptacles, plus individual dedicated circuits for the dishwasher, disposal, microwave, and refrigerator. If you are adding an electric range or wall oven, that circuit is typically 40 to 50 amps. All told, a kitchen remodel can require six to ten new or modified circuits. I run a full load calculation for every kitchen project to make sure your panel can handle the new demand.
Absolutely. We work as a subcontractor on GC-led projects every day. Our team coordinates directly with your general contractor on scheduling, rough-in timing, and inspection windows so the project stays on track. We also take on projects as the primary contractor when the scope is primarily electrical — things like panel upgrades, whole-home rewires, or dedicated circuit additions. Either way, the quality of work and the permit process are exactly the same.
It depends entirely on the scope. A single bathroom circuit or outlet addition is typically a one-visit, same-day project. A full kitchen remodel usually requires two to three visits: rough-in while the walls are open, trim after paint for outlets, switches, and fixtures, and sometimes a final visit for appliances. We coordinate all of this with your project schedule so there is no downtime.
Always. Every electrical permit and state inspection is included in our quote at no additional cost. Inspections should never stress the homeowner, so we handle the entire process — pulling the permit, scheduling the inspection, meeting the inspector, and delivering approval to you. Skipping permits is never an option because unpermitted work creates problems when you sell, refinance, or file an insurance claim.
If your existing panel does not have enough space or capacity for the new circuits, we will recommend either a sub-panel (for additions, garages, or outbuildings) or a full 200-amp service upgrade. A panel upgrade is the single best investment you can make during a remodel because it future-proofs your home for EV chargers, heat pumps, hot tubs, and whatever comes next. We handle the upgrade, the utility coordination, and the inspection as a seamless part of the remodel project.
Yes — and we do them all the time. Not every project is a full gut-job. We regularly add outlets behind wall-mounted TVs, install dimmer switches, run a dedicated circuit for a window AC unit, or add an exterior outlet for holiday lights. These are typically one-visit, same-day projects. No project is too small, and every project gets the same permit, inspection, and warranty.
Ready to Start Your Remodel?
From a single outlet to a whole-home rewire — permits and inspections are always included. Let’s talk about your project.
About the Author
Chadwick Ferguson
Chadwick Ferguson is the owner and licensed Master Electrician behind Bright Haven Electric LLC, serving West Central Minnesota from his base in Milan, MN. With deep expertise in residential, commercial, and agricultural electrical systems, he specializes in modern energy solutions including Level 2 EV charger installations, automatic standby generators, and comprehensive electrical panel upgrades.
Chadwick is committed to providing safe, code-compliant, and reliable electrical work to his rural Minnesota community. As the author of the BHElectric blog, he shares practical insights and expert guidance to help homeowners and businesses navigate the complexities of their electrical systems.